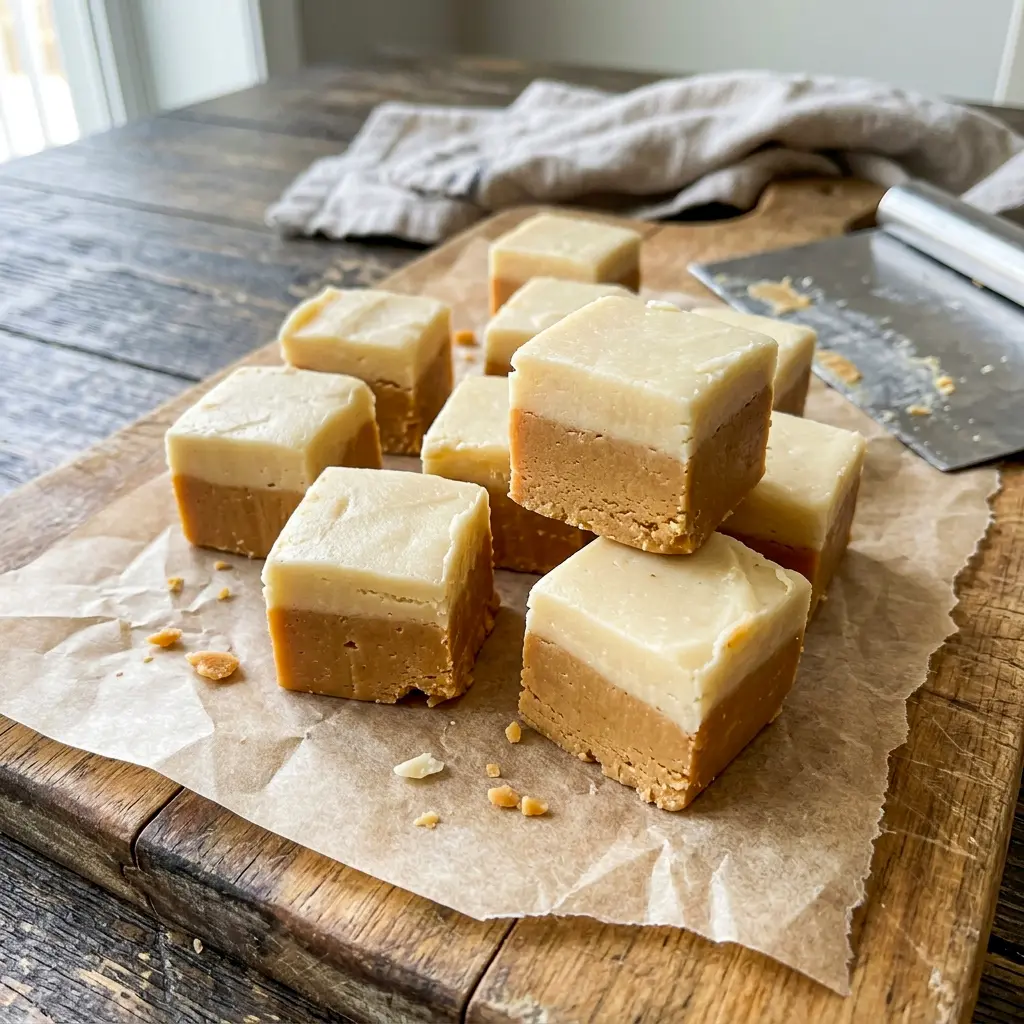
Every fandom has that one flavor that feels like magic, and for Harry Potter fans, it’s butterbeer, which is exactly why this Copycat Butterbeer Fudge exists. Hi, I’m Adelle from Get Away Today, and when it comes to Harry Potter recipes, I’m always the first one testing them out in my own kitchen. Whether you’re a witch, a wizard, or a proud muggle, this treat is built to win you over from the very first bite.
The Wizarding World of Harry Potter has locations in both Florida and California, so visiting in person to sip real butterbeer has never been easier. But not everyone can hop on a flight whenever a craving hits, and that’s exactly the gap this Copycat Butterbeer Fudge fills. You don’t need theme park tickets or a trip across the country to satisfy that butterbeer craving — you just need a saucepan, a handful of ingredients, and about thirty minutes of your time.
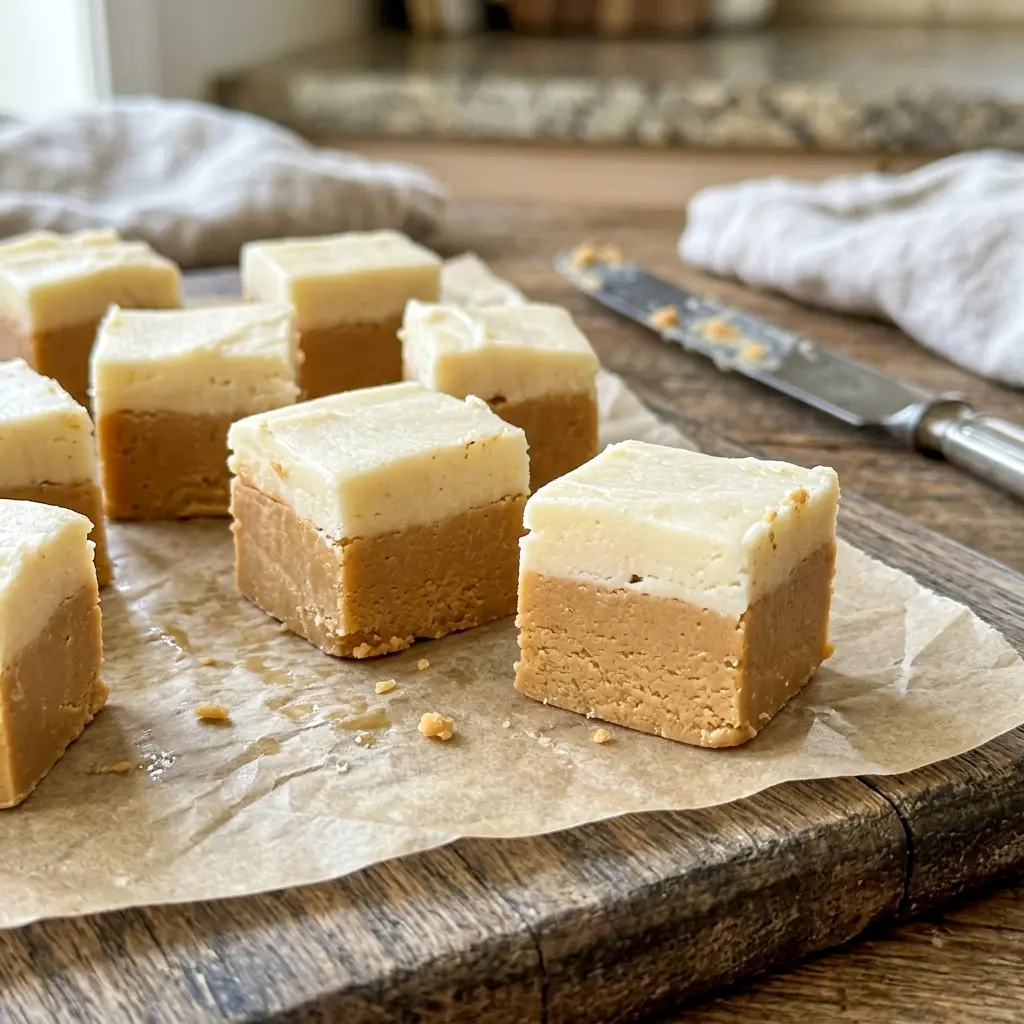
If you’ve never tried butterbeer fudge before, let me set the scene. It’s creamy, sugary, and melts on your tongue almost the second it hits your mouth. The base layer combines butterscotch, a touch of rum extract, and plenty of butter into a rich, golden foundation, topped off with a lighter, softer vanilla layer. Soft, moist, and unbelievably smooth, this Copycat Butterbeer Fudge tastes like something straight out of a wizard’s kitchen, minus the cauldron.
Table of Contents
Why You’ll Love This Copycat Butterbeer Fudge
Let’s talk about exactly why this Copycat Butterbeer Fudge deserves a spot in your baking rotation.
- It tastes just like the real thing. The combination of butterscotch, rum extract, and butter recreates that iconic butterbeer flavor almost perfectly, minus any trip to the theme park.
- Two layers, double the flavor. A rich butterscotch base pairs with a lighter vanilla top layer, giving every bite two distinct textures and flavors in one piece.
- It’s genuinely one of the easiest fudge recipes out there. No candy thermometer required — just a saucepan, a timer, and a little patience.
- It’s a hit with the whole family. Kids love “stirring the potion,” and adults love how closely it mimics the flavor from the books and films, making it one of the most fun family desserts you can put together.
- It’s endlessly shareable. Slice it small, package it up, and you’ve got a treat perfect for parties, gifts, or fandom-themed gatherings.
If you’ve been hunting for easy Harry Potter snack ideas that don’t require a wand or a trip to platform 9¾, this is the recipe to bookmark. It’s also one of the more approachable Harry Potter candy recipes you’ll find, since it comes together with pantry staples and doesn’t demand any special candy-making skills. Once you make a batch, you’ll understand exactly why this has become one of my personal best fudge recipes ever.
The Key Ingredients (and Why You Need Them)
Here’s a look at what goes into this recipe and why each ingredient earns its place. I’m leaving out exact amounts here, since the printable recipe card has all of that — this section is really about understanding what each ingredient does, so you know how the layers come together.
- Butter – The backbone of the base layer, giving the fudge its rich, buttery flavor and smooth texture.
- Evaporated milk – Adds creaminess and helps the sugar mixture cook down into that classic fudge consistency.
- Marshmallow cream – This is the secret to soft, melt-in-your-mouth fudge instead of a dense, overly firm texture.
- White sugar – Provides sweetness and helps everything set properly as it cools.
- Salt – A small amount balances out all that sweetness and rounds out the flavor.
- Rum extract – This is where that signature butterbeer flavor comes from. Don’t worry — rum extract is completely non-alcoholic, it just delivers that warm, distinct flavor note.
- Butter extract – Boosts the buttery flavor even further, layering on top of the real butter already in the mix.
- Butterscotch chips – These melt into the base layer, giving it that deep, golden butterbeer color and rich caramel-like taste.
- Vanilla extract – Used in the top layer to create a lighter, softer contrast to the rich butterscotch base.
- White chocolate chips – Melted into the top layer, these give it a smooth, creamy texture and a subtly sweet finish.
Using high-quality ingredients genuinely makes a difference here — good chocolate chips and real butter go a long way toward making this Copycat Butterbeer Fudge taste as close to the real thing as possible.
How to Make It
Here’s the general process for pulling together this Copycat Butterbeer Fudge. (Full measurements and the complete step-by-step live on the printable recipe card.)
- Prep your pan. Line an 8×8 glass pan with wax or parchment paper, then coat it with cooking spray.
- Cook the base mixture. Combine butter, evaporated milk, marshmallow cream, sugar, and salt in a saucepan. Bring it to a boil over medium heat, stirring constantly the whole time.
- Time it precisely. Once boiling, set a timer for seven minutes and keep stirring the entire time — this step is not one to walk away from.
- Split the mixture. As soon as the timer goes off, remove the pot from the heat and quickly pour one cup of the mixture into a separate glass bowl before it has a chance to set.
- Make the vanilla layer. Stir white chocolate chips and vanilla extract into that reserved cup of mixture until smooth.
- Make the butterscotch layer. Add butterscotch chips, rum extract, and butter extract to the larger portion still in the saucepan, stirring until everything melts together completely.
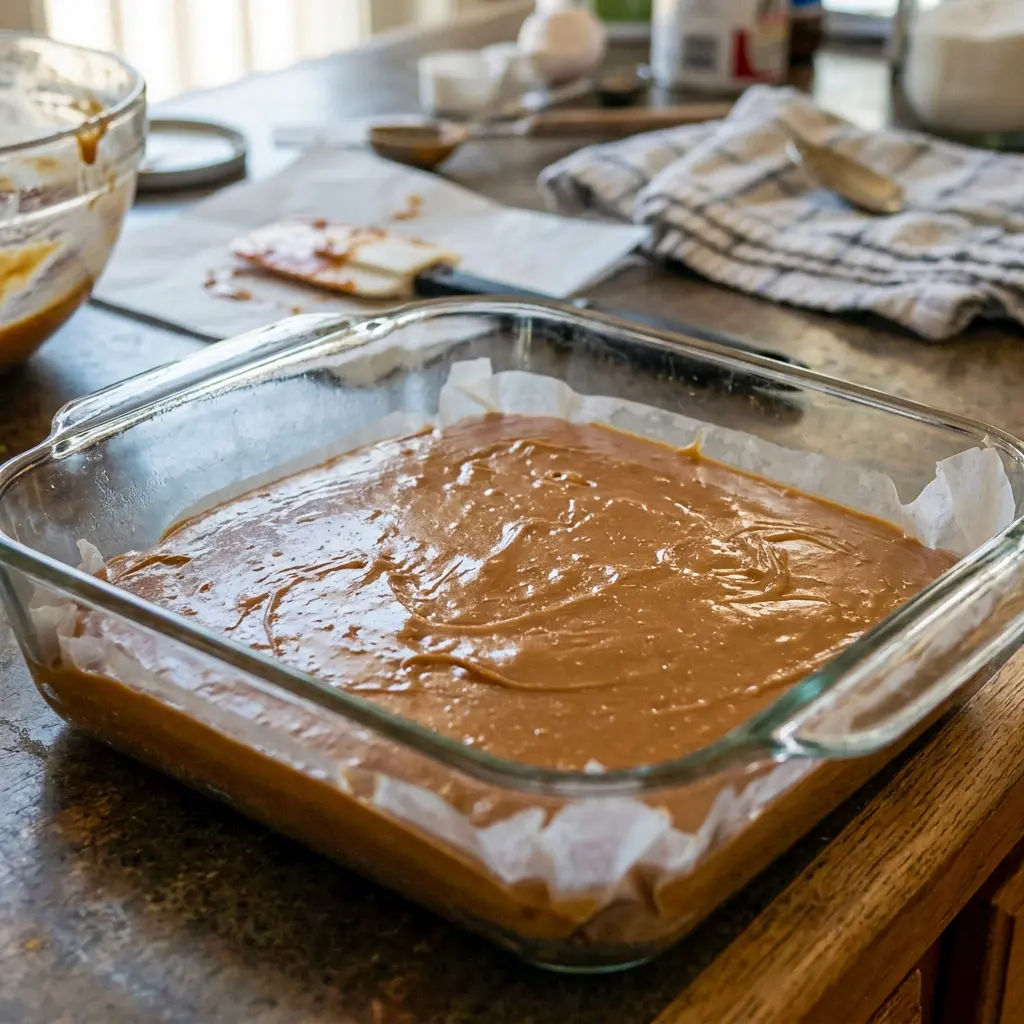
- Build the base layer. Pour the butterscotch mixture into your prepared pan, spreading it evenly into every corner.
- Layer the vanilla on top. Place a sheet of wax paper over the butterscotch layer, then spread the vanilla mixture on top of that wax paper — this trick keeps the two layers from blending together.
- Flip and place. Once the vanilla layer is smooth, flip it over onto the butterscotch layer so the wax paper ends up on top, much like flipping a pancake.
- Chill overnight. Clean up the edges, then refrigerate the pan overnight so the fudge fully firms up.
- Slice and serve. Loosen the edges, turn the pan out onto a cutting board, and slice the fudge into small squares — a little goes a long way with this treat.
Pro Tips for Perfect Copycat Butterbeer Fudge
A few small details make a big difference with this recipe:
- Stir constantly while boiling. Walking away, even for a few seconds, can cause the mixture to scorch on the bottom of the pan.
- Work quickly when splitting the mixture. The base starts setting fast once it’s off the heat, so have your bowl and ingredients ready before the timer goes off.
- Use the wax paper trick for clean layers. Spreading the vanilla layer onto a sheet of wax paper before flipping it prevents it from sinking into the butterscotch layer below.
- Adjust cook time if needed. If your fudge turns out dry and crumbly, reduce the boiling time slightly next round. If it turns out mushy, let it boil a bit longer than seven minutes.
- Chill overnight, not just a few hours. This fudge needs the full overnight rest in the fridge to firm up properly and slice cleanly.
- Invest in good chips and real butter. The quality of your butterscotch and white chocolate chips genuinely affects how close this tastes to the real thing.
Variations to Try
Once you’ve mastered the classic version, here are a few fun ways to switch things up:
- Turn it into a themed party treat. Cut the fudge into extra-small bites and serve it as part of a spread of Harry Potter birthday food ideas for a fan’s celebration.
- Add a sprinkle of gold or bronze sanding sugar on top of the vanilla layer for a magical, shimmery finish.
- Make a bigger batch for gifting. Double the recipe and package individual pieces in small boxes or bags for a homemade gift any Harry Potter fan would love.
- Swap the extracts slightly. A touch more butter extract, or a drop of caramel extract, can shift the flavor profile while keeping that same butterbeer essence.
- Pair it with other fandom treats. Serve this alongside other Harry Potter candy recipes for a full dessert table that fits any movie night or themed party.
Best Ways to Serve
This fudge fits into all kinds of occasions:
- At a Harry Potter movie marathon, cut into small bites for easy snacking during the film.
- On a themed dessert table, alongside other Harry Potter fudge and candy for a full fandom spread.
- As a party favor, wrapped individually for guests to take home.
- Packed into a gift box or tin, perfect for holidays, birthdays, or just because.
- Alongside a mug of hot cocoa or tea, for a cozy night in with a favorite book or film.
Storage Tips for Leftovers
Here’s how to keep your Copycat Butterbeer Fudge fresh:
- Store it in an airtight container to keep it from drying out or picking up other flavors in the fridge.
- Keep it refrigerated for the best texture, since fudge with marshmallow cream and butter can soften at room temperature.
- Slice before storing so pieces are ready to grab whenever a craving strikes.
- A little goes a long way, so don’t be surprised if a single batch lasts you longer than expected, even with a house full of fans.
Frequently Asked Questions
Does this butterbeer fudge contain alcohol?
No. Rum extract is completely non-alcoholic — it simply provides that signature warm, buttery flavor without any actual rum in the mix.
Why is my fudge dry and crumbly?
This usually means it was boiled slightly too long. Try reducing the boil time a bit on your next batch.
Why did my fudge turn out mushy or won’t set?
This typically means it needs a bit more cook time. Let the mixture boil a little longer than the recommended seven minutes next time.
Can I make this ahead of time for a party?
Absolutely. This fudge needs to chill overnight anyway, which makes it a naturally great make-ahead treat for parties or gatherings.
What’s the best pan size for this recipe?
An 8×8 glass pan works best for getting the right thickness on both the butterscotch and vanilla layers.
Can I double this recipe?
Yes, though you’ll want to use a larger pan and may need to work in batches when splitting and layering the mixture, since timing matters a lot in this recipe.
Final Thoughts
At the end of the day, this Copycat Butterbeer Fudge proves you don’t need a trip to the Wizarding World to enjoy one of its most beloved flavors. With a rich butterscotch base, a soft vanilla top layer, and that unmistakable butterbeer taste, it’s easily one of the best baking recipes for any Harry Potter fan’s kitchen. Whether you’re making it for a themed birthday party, a cozy movie night, or just because the craving hit, this treat delivers real magic in every bite. Give this Butter Beer Fudge Recipe a try, and don’t be surprised when it becomes one of the most requested treats in your house.
Follow me on Pinterest for daily new recipes.

Copycat Butterbeer Fudge – The Best Harry Potter Fudge You’ll Ever Make
Description
A rich, golden butterscotch base meets a soft vanilla top layer in this two-toned fudge inspired by the iconic wizarding world treat. Creamy, sweet, and melt-in-your-mouth soft, it’s a no-candy-thermometer-required recipe any fan can pull off at home.
Ingredients
- ¾ cup butter
- ¾ cup evaporated milk
- 1 jar marshmallow cream
- 2 ½ cups white sugar
- ¼ teaspoon salt
- 1 teaspoon rum extract
- 1 teaspoon butter extract
- 1 ½ cups butterscotch chips
- ¾ teaspoon vanilla extract
- ½ cup white chocolate chips
Instructions
-
1. Prepare Your Pan Start by lining the bottom of a glass 8×8 inch baking pan with a sheet of wax paper or parchment paper, making sure it covers the bottom evenly. Once the pan is lined, lightly coat both the pan itself and the paper with cooking spray, ensuring full coverage so the finished fudge releases cleanly later on. Set the prepared pan aside within easy reach of your stovetop.
2. Combine and Cook the Base Mixture In a medium to large saucepan, combine the butter, evaporated milk, marshmallow cream, white sugar, and salt. Place the saucepan over medium heat and bring the mixture to a full boil, stirring constantly and without pausing the entire time. Constant stirring here is essential — the mixture contains a high concentration of sugar and dairy, which can scorch on the bottom of the pan quickly if left unattended even briefly.
3. Time the Boil Precisely The moment the mixture reaches a full, steady boil, start a timer for exactly seven minutes. Continue stirring the entire time the mixture boils, without stopping, to ensure even cooking and to prevent any part of the mixture from burning against the bottom or sides of the saucepan. This seven-minute window is critical to getting the right fudge texture, so don’t be tempted to shorten it or walk away, even for a moment.
4. Split Off the Vanilla Portion As soon as the timer goes off, immediately remove the saucepan from the heat. Working as quickly as you can, since the mixture will begin to set almost right away, carefully pour exactly 1 cup of the hot mixture into a separate glass mixing bowl. Set the remaining mixture, still in the saucepan, aside to use in the next step — it will stay pourable for just a short window, so move efficiently.
5. Make the Vanilla Layer Into the glass bowl containing your reserved 1 cup of mixture, add the ½ cup of white chocolate chips along with the ¾ teaspoon of vanilla extract. Stir the mixture continuously until the white chocolate chips have fully melted and the entire mixture looks smooth, glossy, and uniform in color, with no visible streaks or unmelted chip pieces remaining.
6. Make the Butterscotch Base Layer Return your attention to the larger portion of mixture still sitting in the saucepan. Add the 1 ½ cups of butterscotch chips, 1 teaspoon of rum extract, and 1 teaspoon of butter extract directly into the saucepan. Stir everything together thoroughly until the butterscotch chips have completely melted and the mixture is smooth, glossy, and evenly combined, with a rich golden-amber color throughout.
7. Pour the Base Layer Working quickly before the butterscotch mixture begins to set, pour it from the saucepan into your prepared 8×8 pan. Use a spatula to spread it evenly across the entire pan, pushing it into all four corners so the layer is level and consistent in thickness from edge to edge.
8. Add a Wax Paper Barrier Once the butterscotch layer is spread evenly, lay a fresh piece of wax paper directly on top of it, covering the entire surface. This barrier layer is essential — without it, the softer vanilla mixture you’re about to add will sink and blend into the butterscotch layer below instead of staying distinct on top.
9. Spread the Vanilla Layer Spoon the vanilla mixture out onto the top of the wax paper you just placed over the butterscotch layer. Using a spatula, spread the vanilla mixture as evenly as possible across the wax paper, working it out toward the edges so it covers as much of the surface area as you can manage.
10. Flip the Vanilla Layer into Place Once your vanilla layer looks smooth and even across the wax paper, carefully flip the entire thing over — wax paper and all — so that the vanilla fudge ends up face-down directly on top of the butterscotch layer, with the wax paper now facing up. This motion is similar to flipping a pancake in a pan. If this step feels tricky to manage in the same pan, an easier alternative is to spread the vanilla layer onto a piece of wax paper inside a second 8×8 pan first, then lift that wax paper (with the vanilla fudge stuck to it), flip it over, and lay it directly on top of the butterscotch layer in your original pan.
11. Clean Up the Edges Once both layers are in place, use a knife or offset spatula to tidy up the edges of the fudge, smoothing out any uneven spots along the sides of the pan for a cleaner final presentation.
12. Chill Overnight Transfer the pan to the refrigerator and let the fudge chill overnight. This extended chilling time is necessary for the fudge to fully firm up and set into a sliceable texture — rushing this step will leave you with fudge that’s too soft to cut cleanly.
13. Remove and Slice When you’re ready to serve, run a straight edge, like a butter knife, around the inside edges of the pan to loosen the fudge from the sides. Carefully invert the pan over a cutting board, gently coaxing the fudge to slide out in one piece. Once it’s out of the pan, slice the fudge into small bite-sized squares, since this treat is rich and sweet enough that a small piece goes a long way.
Notes
- Texture troubleshooting: If your finished fudge turns out dry or crumbly, reduce the boiling time slightly the next time you make it. If it turns out too soft or mushy, let it boil a little longer than the recommended seven minutes.
- Ingredient quality matters: Using high-quality butterscotch and white chocolate chips, along with real butter, makes a noticeable difference in both flavor and texture.
- Storage: Store the finished fudge in an airtight container, ideally in the refrigerator, to keep it fresh and maintain its texture.
- Alcohol note: Rum extract used in this recipe is non-alcoholic — it simply provides flavor, making this treat safe to serve to guests of all ages.
- Category: Dessert