
Candy Cane Pie Recipe lovers, buckle up—because we’re about to dive headfirst into the dreamiest mint-peppermint cloud you’ll ever slide onto a holiday table. This pie is cool, creamy, minty, and basically what would happen if your favorite candy canes and a fluffy no-bake cream pie decided to raise adorable dessert babies together.
It’s one of those Minty Christmas Desserts that makes you stop mid-bite and think, “Oh wow… yep, this one’s going into the holiday rotation forever.” And honestly? Same. Every time I make it, people do that tiny happy shimmy while eating, and that’s how you know it’s a winner.
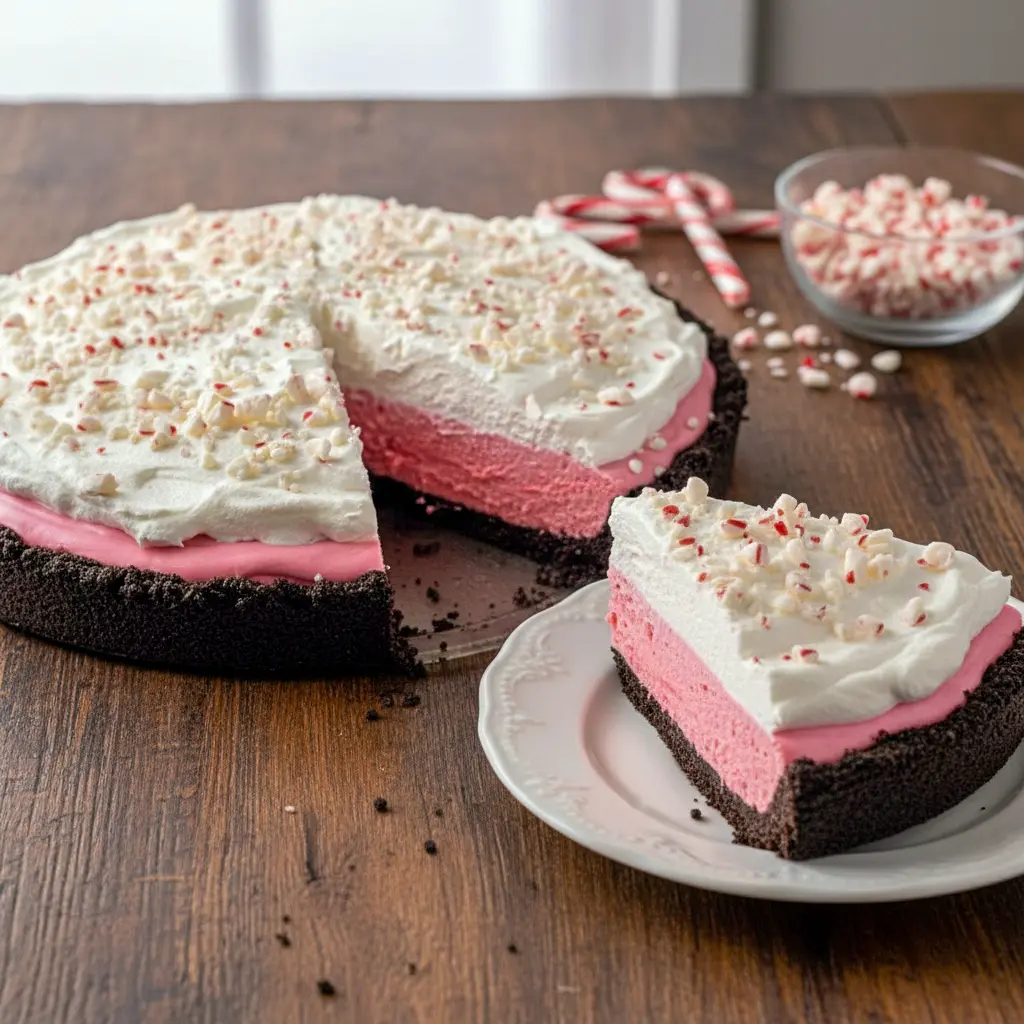
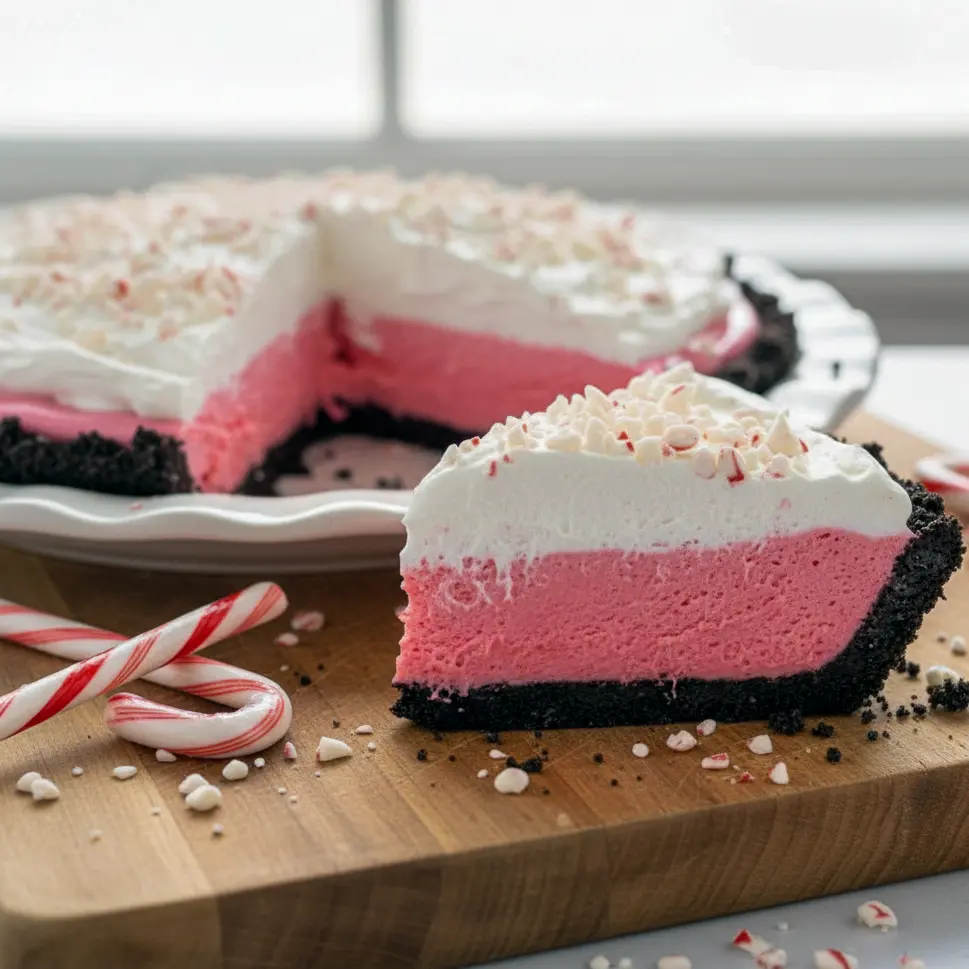
This pie checks every single seasonal dessert box:
– refreshing peppermint
– luscious pink filling
– crunchy Oreo crust
– a snowy layer of fluffy topping
– sparkles of crushed candy canes
Plus, it’s basically a no-bake pie. IMO, that alone deserves a standing ovation—because holiday baking is chaotic enough without another oven-hogging dessert.
So grab your candy canes, grab your Oreos, and let’s get festive.
Why This Candy Cane Pie Recipe Is Completely Irresistible
Ever make a dessert that disappears faster than you can say “save me a slice”? That’s this pie. There’s something magical about the combination of cool peppermint and chocolatey Oreo crumbs that hits the holiday nostalgia button like nothing else.
Here’s why everyone goes wild for it:
1. It’s ridiculously easy.
As far as an Easy Dessert For Christmas goes, this might be the easiest one that still earns you bragging rights. A few minutes on the stove, a little mixing, and then the fridge does all the real work.
2. The color is gorgeous.
That naturally soft pink filling gives major holiday vibes without screaming for attention. No neon bakery pink here—just a dreamy, subtle peppermint blush.
3. It tastes like peppermint heaven.
The creamy filling has that perfect balance of cool mint and sweet marshmallow. It’s refreshing without being overpowering.
4. Oreo crust. Enough said.
Chocolate and peppermint are the power duo of December. And since the crust freezes to set, it stays firm and slices like a charm.
5. It’s a crowd-pleaser for all ages.
Kids love it. Adults love it. Even your “I don’t really eat sweets” friend mysteriously grabs a fork.
6. It’s customizable.
Want it pinker? Go ahead. Want it mintier? Add another drop of peppermint extract. Need a gluten-free version? Use GF chocolate sandwich cookies and boom—done.
It also fits right into that category of Holiday Desserts Christmas Pies that look impressive but basically require minimum effort. My kind of Christmas miracle.
Simple Ingredient Breakdown (What You Actually Need)
One of the most loveable things about this pie is that the ingredient list isn’t a mile long. Everything is easy to find, easy to work with, and easy to love. Let’s break it down:
The Crust
- Oreos
These get blended into fine crumbs and create that chocolate-peppermint magic. - Melted Butter
Helps the crumbs hold their shape once frozen.
The Creamy Peppermint Filling
- Mini Marshmallows
Melt into a smooth, slightly fluffy base. - Heavy Whipping Cream
Gives the filling richness and body. - Peppermint Extract
The tiny but mighty star! A little goes a long way. - Red Gel Food Coloring
Optional, but it gives that gorgeous light pink hue. - Cool Whip
Makes the filling silky and light. You can swap in homemade whipped cream if that’s your style. - Crushed Candy Canes/Candy Cane Pieces
For topping and a little crunch. These are what give the pie its holiday sparkle.
This lineup supports what I like to call the trifecta of Simple Holiday Desserts: minimal steps, affordable ingredients, and maximum wow factor.
How to Make Candy Cane Pie (The Chill, No-Stress Way)
Let’s go step-by-step—but in the easy, no-pressure way. Because holiday desserts shouldn’t make you want to hide in the pantry with a cookie.
Step 1 — Prep the Pie Dish
Rub a 9-inch pie plate with softened butter or shortening. This quick step makes slicing clean and painless.
Step 2 — Make the Oreo Crust
Process the Oreos into fine crumbs. While the processor runs, drizzle in the melted butter.
Press the crumbs firmly into the bottom and up the sides of the dish.
Pop that beauty into the freezer for 20 minutes.
Pro tip: Firm pressure = no cracks when slicing.
Step 3 — Melt the Marshmallows
Stir the mini marshmallows and heavy cream in a saucepan over medium heat until smooth. It takes about 5 minutes. Don’t walk away—marshmallows love to misbehave if ignored.
Step 4 — Cool It Down
Let the mixture cool to room temperature, stirring every few minutes.
Tip: See the cooling tricks below to speed this up. (FYI, this is the only slightly “slow” step.)
Step 5 — Add the Flavor & Color
Stir in peppermint extract and red gel food coloring.
Mix until the color looks uniform—nobody wants red streaks unless it’s intentional.
Step 6 — Fold in the Cool Whip
Add half of the Cool Whip and mix until everything looks smooth and dreamy.
Step 7 — Assemble the Pie
Spread the filling into your chilled crust.
Add the remaining Cool Whip over the top like a fluffy snow drift.
Step 8 — Chill (The Pie… and You)
Cover and refrigerate for at least 6 hours—overnight is even better for a firmer, cleaner slice.
Step 9 — Add the Crunch
Wait until right before serving to sprinkle the crushed candy canes so they keep their crisp texture.
And voila! The easiest Peppermint Cream Pie of your life.
The Story Behind This Holiday Favorite
Every classic recipe has a great origin story, right? This one started decades ago with those dreamy, vintage marshmallow-cream pies—light, fluffy, and easy to whip up. Over time, holiday bakers thought, “Why not add peppermint?” Then someone brilliant grabbed a bag of Oreos and changed dessert history forever.
This pie has become a staple for anyone who loves Christmas Treats Diy projects. It’s fun, it’s creative, and it gives big nostalgic 1950s holiday vibes while still feeling modern. And there’s something undeniably whimsical about taking a simple peppermint candy and turning it into a whole festive dessert.
Plus, if your family is anything like mine, you always end up with ten million candy canes by mid-December. If you’ve ever wondered What To Do With Leftover Candy Canes, this pie is basically your answer wrapped in a crust.
Pro Tips for the Best Candy Cane Pie Ever
If you want this recipe to reach its full holiday glory, here are some must-know tricks:
• Cool the marshmallow mixture quickly.
Use an ice bath, chill the saucepan in the fridge, or transfer to a mixing bowl to cool faster.
• Mix the food coloring well.
A few swirls of color look pretty… but not in this pie. Blend until the color is silky and even.
• Press the crust firmly.
Loose crust equals crumbly slices. Firm crust equals clean, perfect pieces.
• Add topping right before serving.
Candy cane pieces melt in the fridge. Keep them crunchy by adding them at the last second.
• Use gel coloring, not liquid.
Gel won’t water down your filling.
• Don’t skip the chill time.
The pie needs hours to set. Trust me—cutting too early leads to peppermint soup.
Fun Variations to Stir Things Up
Feeling creative? Here are some delicious ways to remix this pie:
Chocolate Drizzle Version
Drizzle chocolate sauce over the top for a peppermint-mocha vibe.
White Chocolate Version
Fold in melted white chocolate for a richer, silkier filling.
Mint Chocolate Chip Version
Add mini chocolate chips to the filling. Instant kid favorite.
Dream Whip Pie Throwback
Swap Cool Whip for a homemade fluffy topping to give it that vintage Dream Whip Pie texture.
Gluten-Free Version
Use GF chocolate sandwich cookies for the crust—everything else stays the same.
Extra Candy Cane Crunch
Layer crushed candy canes between filling and topping for more texture.
Best Way to Serve This Holiday Treat
This pie loves to be served chilled—nice and frosty from the fridge.
Pair it with:
– hot cocoa
– peppermint mocha
– a cup of strong coffee
– mulled cider
– a holiday punch
Serve thin slices if you’re feeding a crowd or generous wedges if everyone’s in the holiday spirit (which… duh).
It’s a perfect Easy Dessert For Christmas, potlucks, holiday gatherings, dessert bars, or that one day in December when you decide “I deserve a festive treat today.”
Quick Storage Tips & Leftover Strategy
Because yes, leftovers happen… sometimes.
• In the fridge:
Cover and store for up to 5 days. The flavor gets even better on days 2–3.
• In the freezer:
Double-wrap (plastic wrap + foil) and freeze for up to 2 months.
Texture might change slightly, but it still tastes amazing.
• Serving after freezing:
Let it thaw in the fridge—not on the counter.
And let’s be real—if you end up with leftover slices, you can chop them into cubes and layer them into a parfait. Dessert hack unlocked.
FAQs About Candy Cane Pie
Q: Can I make this ahead of time?
Absolutely. This recipe loves being made a day ahead.
Q: Can I use homemade whipped cream?
Yes! Just whip heavy cream with powdered sugar and vanilla. It replaces Cool Whip perfectly.
Q: What if I don’t like peppermint?
Swap it for vanilla and keep the pink color. Still festive, still delicious.
Q: Can I use a premade crust?
Yep. A chocolate pie crust works in a pinch.
Q: Do the candy canes get chewy?
If added too early—yes. Add them right before serving for crisp texture.
Q: Can I make this into mini pies?
Of course! Use muffin tins or ramekins.
Q: Is this pie kid-friendly?
Totally—no alcohol, no complicated steps, and kids love the peppermint flavor.
Final Thoughts on This Dreamy Christmas Pie
This pie checks every holiday dessert box. It’s creamy, minty, cool, festive, and gorgeously pink. It’s easy enough for beginners, fast enough for busy cooks, and impressive enough to steal the spotlight from any cake on the table.
Whether you’re making it for the family, a party, or just because the week has been a lot (we’ve all been there), this pie guarantees smiles.
It’s one of those effortless Holiday Desserts Christmas Pies that actually looks like you worked way harder than you did. And honestly? That’s my favorite kind of holiday win.
So grab those candy canes, blend those Oreos, and whip up the coziest, coolest Christmas dessert of the season. Your holiday crew won’t just like it—they’ll crave it year after year.
If you want help turning this into a printable recipe card, a social caption, or even a Pinterest description, just let me know! Print

Dreamy Candy Cane Pie Recipe – A Minty Christmas Desserts Favorite Everyone Craves
- Total Time: 20 minutes
- Yield: 10 servings 1x
Description
This dreamy peppermint pie is everything you want in a holiday dessert—smooth, fluffy, mint-kissed filling nestled inside a crunchy Oreo crust and topped with a snowy layer of whipped cream. It’s festive, refreshing, and ridiculously easy to whip together for your holiday crowd.
Ingredients
Oreo Crust
- 24 Oreo cookies
- 5 tablespoons melted butter
Peppermint Filling
- One 10 oz bag mini marshmallows
- ½ cup heavy whipping cream
- 1 teaspoon peppermint extract
- 1 drop red gel food coloring
- 16 ounces Cool Whip, thawed
- Crushed peppermint candy canes for topping
Instructions
Make the Crust
- Lightly coat a 9-inch pie dish with butter or shortening and set it aside.
- Toss the Oreos into a food processor and pulse until they turn into fine crumbs. With the processor running on low, drizzle in the melted butter so every crumb gets evenly moistened.
- Pour the crumb mixture into the prepared pie plate and press it firmly across the bottom and up the sides. Pop the crust into the freezer for about 20 minutes to firm up.
Prepare the Peppermint Filling
- While the crust chills, grab a small saucepan and add the mini marshmallows and heavy cream. Warm the mixture over medium heat, stirring nonstop until the marshmallows melt into a creamy, smooth mixture—this takes roughly 5 minutes.
- Remove the pan from the heat and let the mixture cool to room temperature, giving it a stir now and then to help it cool more quickly.
- Once cooled, mix in the peppermint extract and a drop of red gel coloring until fully blended and evenly tinted.
- Spoon in half of the Cool Whip and fold gently until the filling looks soft, fluffy, and uniform in color.
- Spread this peppermint filling into the frozen Oreo crust.
- Top the pie with the remaining Cool Whip, spreading it in an even, smooth layer across the top.
- Cover the dessert with plastic wrap or a pie lid and refrigerate it for a minimum of 6 hours (overnight creates the best texture).
- Right before serving, scatter crushed candy cane pieces over the top for the perfect minty crunch. Slice and enjoy!
Notes
If you don’t want to use Cool Whip:
- Whip together 3 cups of heavy whipping cream and ⅔ cup powdered sugar until stiff peaks form. Use half in the filling and spread the remaining half on top.
Want the marshmallow mixture to cool faster? Try one of these tricks:
- Chill the saucepan in the refrigerator for 15 minutes
- Set the saucepan in a shallow ice bath
- Transfer the mixture to a clean mixing bowl so it cools quicker than in the warm pan
Coloring tip:
- Blend the gel food coloring thoroughly to avoid streaks of red in the final pie.
Crust & topping tips:
- Press the crumbs firmly into the dish to help avoid cracking when slicing.
- Add the crushed candy canes right before serving to keep them crisp and crunchy.
- Prep Time: 15 minutes
- Cook Time: 5 minutes
- Category: Desserts
Nutrition
- Calories: 378 kcal
- Sugar: 35 g
- Sodium: 211 mg
- Fat: 18 g
- Saturated Fat: 9 g
- Unsaturated Fat: 6 g
- Trans Fat: 0.2 g
- Carbohydrates: 54 g
- Fiber: 1 g
- Protein: 4 g
- Cholesterol: 36 mg


