
If you’ve never tasted Salted Honey Pie before, get ready for a wild little plot twist in your dessert life. This golden beauty hits that sweet spot (literally) between cozy comfort and impressive elegance. And here’s the kicker—it’s shockingly simple to make. This pie feels fancy enough for holidays yet totally doable on a random Tuesday when the craving kicks in. Honestly, it’s so Fun To Bake, you might find yourself whipping it up more often than you expect.
This stunner blends velvety custard, warm honey notes, and a final sprinkle of sea salt that sends everything over the top. It’s one of those Popular Pie Recipes people taste once and then immediately ask, “Wait… what is this magical thing?” And if you’re in the mood for Pie Recipes Dessert Easy, this one fits the bill in the tastiest way.
Before we dive deep into ingredients, tips, variations, and all the good stuff, let’s talk about why this pie deserves a spot in your rotation—whether you love September Baking Recipes, need a new go-to for September Deserts, or just want something a little unexpected (looking at you, fans of Weird Things To Bake).
Introduction to the Recipe
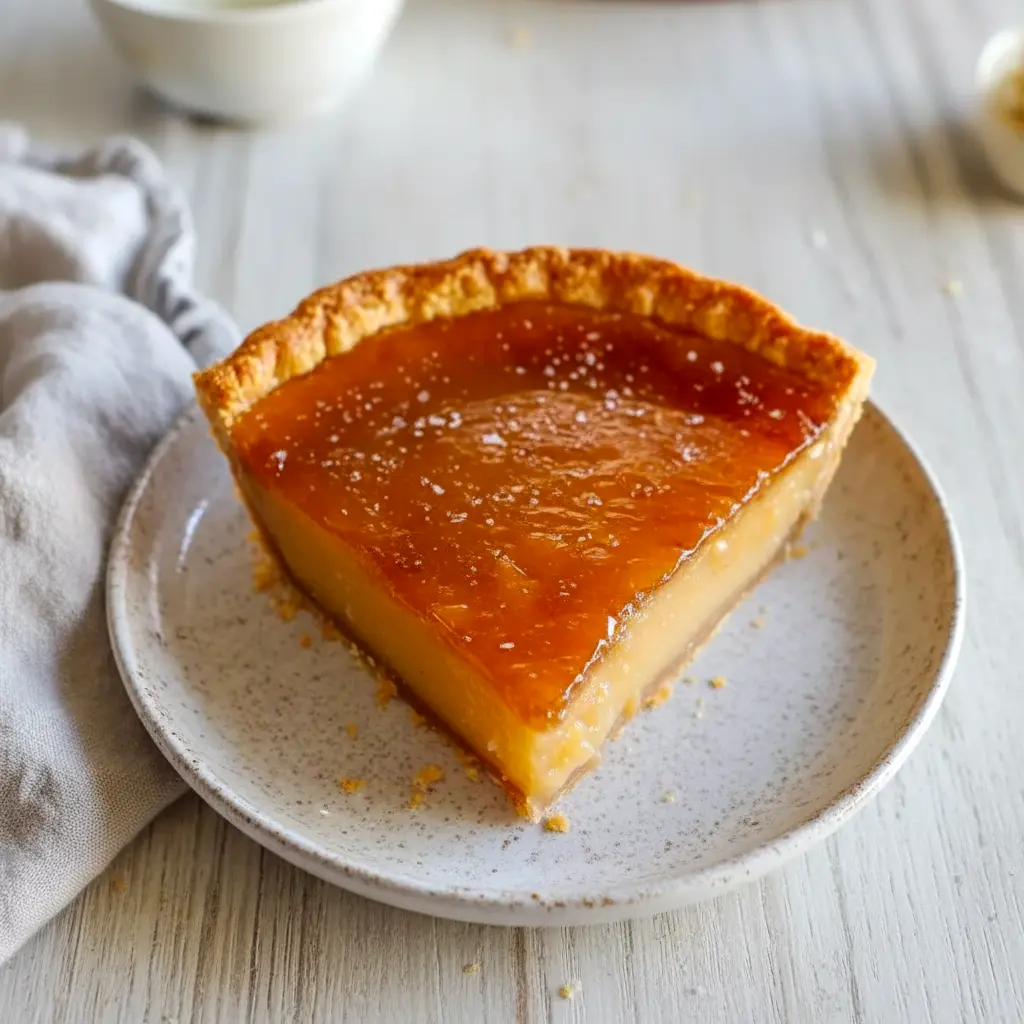
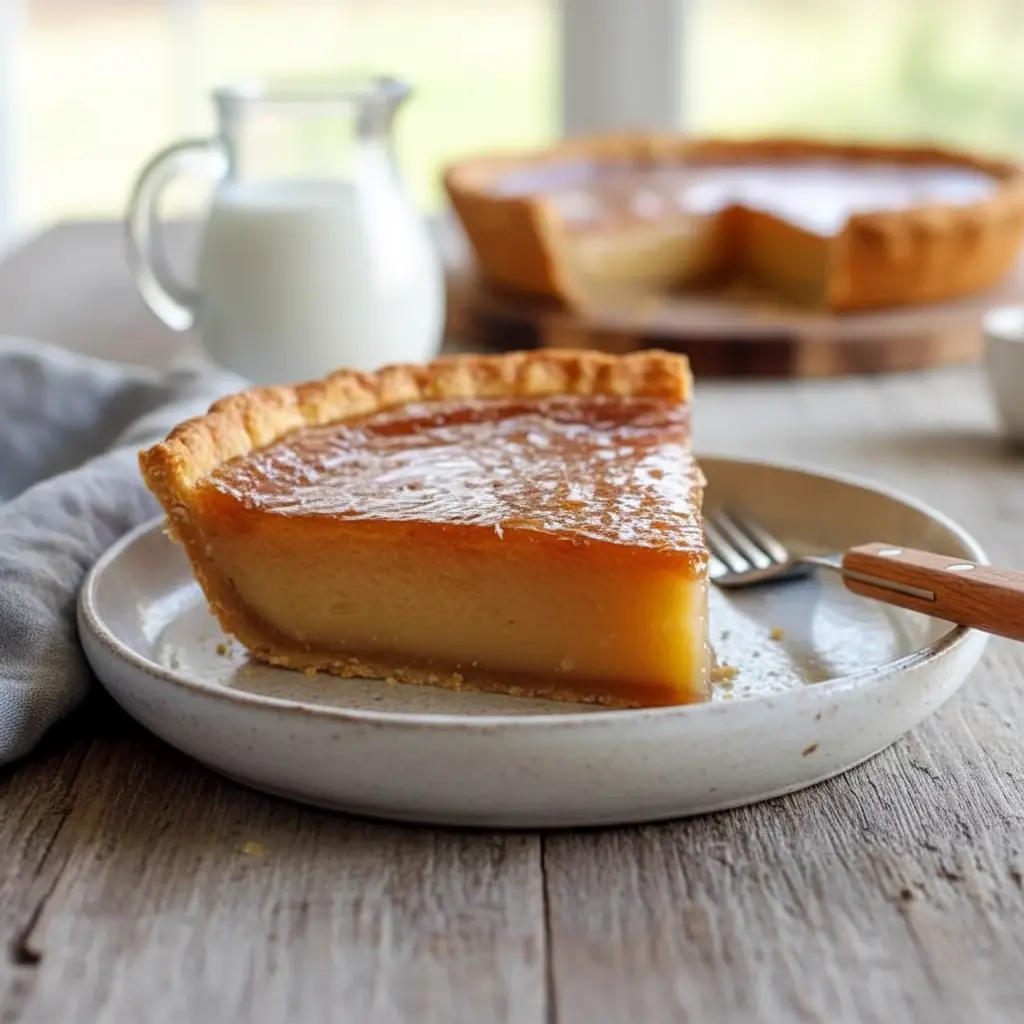
Salted Honey Pie is a Southern-inspired dessert that tastes like a hug wrapped in sunshine. The filling is silky, rich, and full of warm honey flavor, and the flaky crust holds everything together like a champ. A tiny sprinkle of sea salt on top adds a bold contrast that keeps every bite interesting—sweet but not too sweet, old-fashioned yet totally modern.
It’s the type of dessert that feels nostalgic even if you’ve never had it before. And IMO, the smooth custard texture is so dreamy you’ll wonder why you didn’t bake this earlier.
Thinking about holiday gatherings? Dinner parties? Late-night snacking? Trust me, this recipe works for all of them.
What Makes This Recipe So Irresistible?
Let’s be honest: there are lots of Different Pies To Make, but few balance simplicity and “wow” factor like this one. Here’s why people fall in love on the first slice:
Bold yet balanced flavor.
Honey brings natural complexity, and sea salt lifts it, giving every bite a sweet-salty contrast you’ll crave again.
Silky texture.
The custard filling is smooth, soft, and slices like a dream.
Surprisingly easy.
Even new bakers can pull this off—no fussy steps, no weird tools, no specialty ingredients.
Flexible.
Dress it up or keep it simple. Serve warm, room temp, or cold. It all works.
Perfect for any season.
It shines in fall, but fits winter holidays, spring celebrations, and summer picnics.
Plus, for everyone hunting for September Deserts, this pie has that golden, cozy autumn vibe that fits right in.
Ingredients List (With Quick Notes)
Before we get cooking, here’s your easy ingredient rundown. Every item plays a role, so don’t skip!
For the Crust
- 1 9-inch pie crust (homemade or store-bought — both work great!)
For the Filling
- ½ cup unsalted butter, melted and slightly cooled
Helps create that silky rich texture. - ¾ cup granulated sugar
Sweetens without overshadowing the honey. - ¼ cup fine cornmeal
Adds structure without changing the smooth mouthfeel. - ¼ teaspoon salt
- 1 tablespoon white vinegar or lemon juice
Gives the custard brightness and balance. - 1 teaspoon vanilla extract
- ½ cup honey (clover, wildflower, etc.)
The star of the show. - 3 large eggs
- ½ cup heavy cream
Makes everything luscious.
For Finishing
- Flaky sea salt
The dramatic flourish at the end.
If you ever search for Jelly Pie or even quirky throwback sweets like Squirrel Pie (yup, those exist), this one will feel familiar—but way tastier and definitely prettier.
Simple Step-by-Step Instructions
No complicated techniques. No stress. Just good pie.
Step 1: Prep the Crust
Blind bake the crust for a crisp bottom—nobody wants soggy pie. Bake at 375°F with weights for 12–15 minutes, then 5 minutes uncovered.
Step 2: Make the Filling
Whisk melted butter, sugar, cornmeal, salt, vinegar/lemon, vanilla, and honey. Add eggs one at a time. Stir in heavy cream until smooth.
Step 3: Fill and Bake
Pour into the crust and bake at 350°F for 40–50 minutes. Look for a center that barely jiggles.
Step 4: Cool and Salt
Let it cool for at least two hours. Sprinkle flaky salt right before serving.
That’s it! Easy enough to make any night feel special.
The Story Behind the Recipe
Salted Honey Pie feels like something your grandmother could have made, even if she didn’t. It pulls inspiration from classic Southern custard pies—simple ingredients, pantry staples, no nonsense.
Traditional chess and buttermilk pies were popular because they relied on items families always had on hand. This version adds honey for body and sweetness and gives it a modern edge with sea salt. It’s nostalgic with a glow-up.
If you enjoy exploring heritage bakes or trying Weird Things To Bake in the best way possible, this pie scratches that itch without going full Squirrel Pie territory.
Pro Tips for the Best Outcome
Want a flawless pie every single time? Keep these gems in mind:
Use room-temperature eggs for a smoother texture.
Don’t overbake—a slight wobble in the center is perfect.
Chill the crust before blind baking to prevent shrinking.
Choose good honey—cheap honey affects flavor big time.
Let it cool fully for clean slices.
FYI: Rushing the cool time is the #1 reason pies end up runny.
Variations to Try
Once you’ve mastered the original, have fun experimenting! These twists keep the recipe fresh and exciting:
Lavender Honey Pie
Steep dried lavender in the cream for floral notes.
Citrus Honey Pie
Add lemon or orange zest.
Brown Butter Honey Pie
Swap the melted butter with browned butter for more depth.
Spiced Honey Pie
Add cinnamon, nutmeg, or cardamom for warm fall vibes.
Nutty Crust Honey Pie
Use a pecan or almond crust for crunch.
These are perfect when you’re browsing Different Pies To Make and want something elevated yet approachable.
Best Way to Serve
Presentation matters, especially when dessert already tastes like a dream. Try serving with:
- Fresh berries for color
- Whipped cream (lightly sweetened)
- A drizzle of honey
- A warm knife for the cleanest slices
- Edible flowers for a fancy touch
This pie fits beautifully into Light Summer Suppers, fall dinners, or cozy winter evenings.
Quick Tips for Storage and Leftovers
Store:
Refrigerate, covered, up to 4 days.
Freeze:
Wrap tightly and freeze for up to 2 months.
Reheat:
Warm slices gently in the oven or microwave—don’t overdo it or the custard might soften too much.
It keeps its shape really well, so it’s great for gifting or make-ahead baking.
FAQs About Salted Honey Pie
Is store-bought crust okay?
Absolutely. Use it guilt-free.
Is this pie super sweet?
Nope! The salt keeps everything balanced.
Can I replace honey with maple syrup?
You can, but the flavor and texture will change.
Does it need refrigeration?
Yes, because it’s a custard pie.
Can I make it dairy-free?
Plant-based butter and coconut cream will do the job, but flavor varies slightly.
Does it travel well?
Yes! Once cooled, it holds together like a champ.
Final Thoughts
Salted Honey Pie is the dessert you didn’t know you were missing. It’s silky, stunning, and ridiculously satisfying—one of those Popular Pie Recipes that never disappoints. Whether you’re exploring September Baking Recipes, craving something classic with a twist, or just want a treat that’s surprisingly simple, this pie checks every box.
It’s elegant without being pretentious, comforting without being boring, and memorable without requiring much effort. A true keeper.
Give it a try, share it with friends, and watch it become a new favorite. And if you love trying unexpected bakes (hello again, Jelly Pie and other Weird Things To Bake), this one fits right into your delicious adventure list.
Ready for your next slice of golden goodness? Print

Decadent Salted Honey Pie – Fun to Bake & Perfect for Popular Pie Recipes Fans
- Total Time: 1 hour 5 minutes
- Yield: 8 slices 1x
Description
Salted Honey Pie is one of those desserts that feels luxurious without demanding much effort. A velvety honey-based custard is nestled into a golden, flaky crust, and a final pinch of sea salt adds a bold contrast that makes each bite unforgettable. Whether you’re baking for a holiday gathering, a cozy dinner, or simply treating yourself, this pie strikes the perfect balance of rich, comforting, and elegant.
Ingredients
Crust
- 1 blind-baked 9-inch pie shell (store-bought or homemade)
Filling
- ½ cup unsalted butter, melted and cooled slightly
- ¾ cup granulated sugar
- ¼ cup finely ground cornmeal
- ¼ teaspoon salt
- 1 tablespoon lemon juice or white vinegar
- 1 teaspoon vanilla extract
- ½ cup honey (clover or wildflower adds the best flavor)
- 3 large eggs
- ½ cup heavy cream
Topping
- Flaky sea salt (such as Maldon)
Instructions
- Blind bake the crust.
- Start by chilling your pie dough, then line it with parchment or foil and fill it with pie weights. Bake at 375°F (190°C) for 12–15 minutes. Remove the weights and bake for another 5 minutes until lightly golden. Set aside to cool while preparing the filling.
- Mix the filling.
- In a large mixing bowl, whisk together the melted butter, sugar, cornmeal, salt, lemon juice or vinegar, vanilla, and honey until smooth and well blended.
- Add the eggs.
- Crack in the eggs one at a time, whisking thoroughly after each one. Pour in the heavy cream and mix until the filling is silky.
- Fill and bake.
- Pour the custard mixture into your pre-baked crust and place the pie on a baking sheet. Bake at 350°F (175°C) for 40–50 minutes. The pie is ready when the center barely jiggles. If the crust browns too quickly, loosely cover the edges with foil.
- Cool the pie completely.
- Let the pie rest on a wire rack for at least 2 hours. This allows the custard to set properly and ensures clean slices.
- Finish with sea salt.
- Right before serving, sprinkle a touch of flaky sea salt across the top for that signature sweet-salty finish.
Notes
- Bring your eggs and cream to room temperature for the smoothest texture.
- Don’t skip blind baking—the crust stays crisp and never soggy.
- Allowing the pie to cool fully is essential for clean, stable slices.
- A high-quality honey dramatically enhances the final flavor.
- Lemon juice and white vinegar both add brightness—use whichever you prefer.
- Store leftover slices tightly wrapped in the refrigerator for up to 4 days.
- Prep Time: 15 minutes
- Cook Time: 50 minutes
- Category: Desserts


