
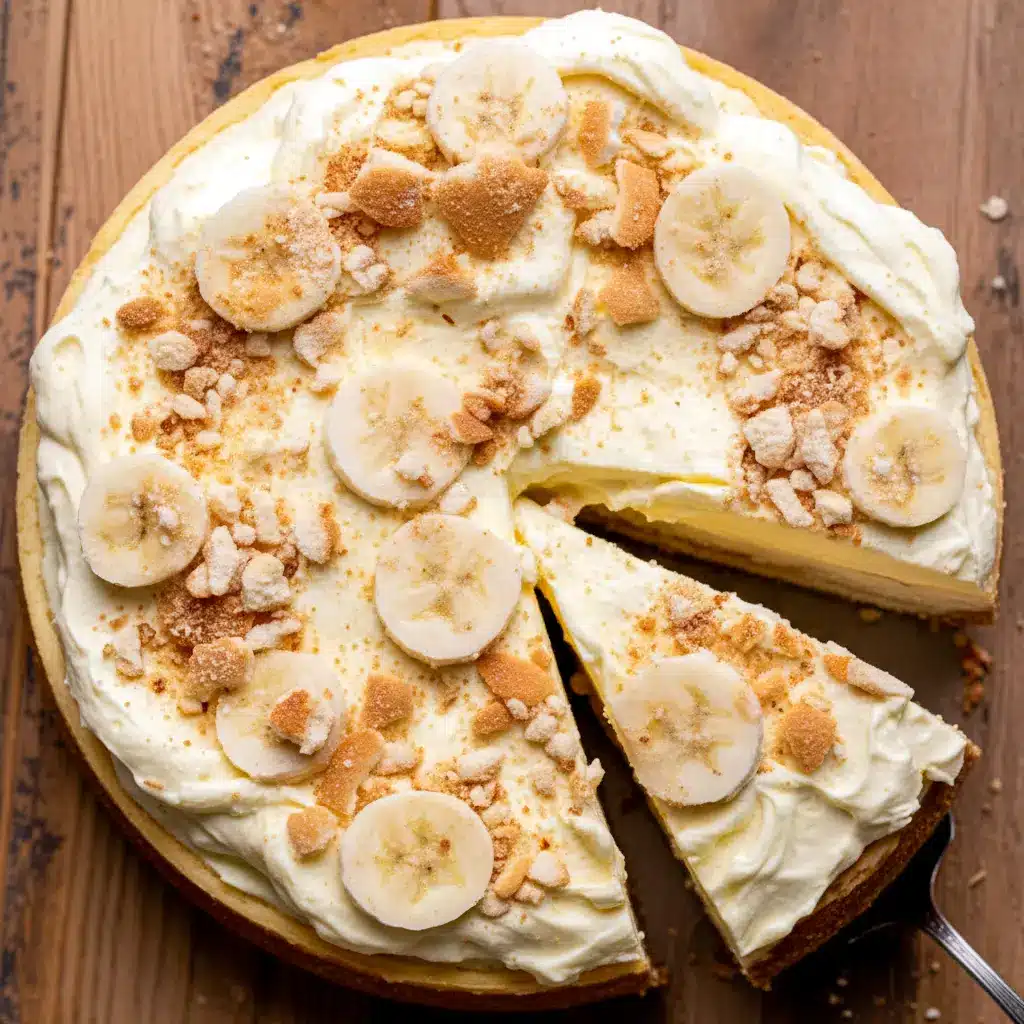
Right from the first slice, Banana Pudding Cheesecake With Wafers makes it clear this isn’t your average dessert.
It’s banana pudding. It’s cheesecake. It’s crunchy, creamy, nostalgic, and just a little dramatic in the best way.
If you’ve ever stood at a potluck guarding the last scoop of banana pudding like it was treasure, this recipe was made for you. And if you think classic banana pudding can’t get better? Oh, it absolutely can.
Because now we’re adding cheesecake.
Let’s talk about what makes this dessert so outrageously good.
A Quick Introduction to This Banana Pudding Cheesecake Recipe
This isn’t just another banana-flavored cheesecake.
This is a full-on Banana Pudding Cheesecake Recipe that tastes exactly like classic banana pudding—only richer, smoother, and more indulgent.
You get:
- A buttery Nilla Wafer crust
- Creamy banana cheesecake filling
- A hidden layer of sliced bananas
- Crushed wafers for crunch
- Fluffy whipped vanilla pudding on top
Every bite hits with nostalgia and luxury at the same time.
It’s comfort food leveled up.
Why You’ll Fall Hard for This Banana Pudding Cheesecake With Wafers
Let’s break it down.
Why does this dessert steal the spotlight every single time?
Because it combines everything people love about banana pudding with everything people obsess over in cheesecake.
Here’s what makes it unforgettable:
- Creamy, velvety texture that melts on your tongue
- Crunch from Nilla Wafers baked right in
- Real banana flavor without being overpowering
- A whipped pudding topping that feels light and dreamy
- That classic vanilla-cookie nostalgia
Honestly, it’s even better than traditional banana pudding. Yes, I said it.
This is the dessert people talk about days later.
The Story Behind This Banana Pudding Dessert With Nilla Wafers
Banana pudding holds a special place in dessert history. It’s the dish that shows up at holidays, church gatherings, family cookouts—you name it.
But sometimes you want something familiar… with a twist.
That’s where this Banana Pudding Dessert With Nilla Wafers comes in.
I wanted something that:
- Felt nostalgic
- Looked impressive
- Tasted even better than the original
And cheesecake was the obvious upgrade.
Cheesecake adds structure. It adds richness. It transforms soft pudding into a sliceable, show-stopping dessert.
When you fold banana pudding flavors into cheesecake form, you get magic.
Ingredients Breakdown — Every Layer Matters
Let’s talk components. Each one plays a role.
Nilla Wafers (For the Crust)
You’ll use one full box for the crust.
Crushed finely and mixed with butter, they create a sweet, slightly crunchy base that screams banana pudding.
Tip: You need about 1 ½ boxes total for the entire recipe.
One for crust. Half for layering.
That’s what gives this Banana Cheesecake With Nilla Wafers its signature texture.
Cream Cheese
The backbone of the cheesecake.
Bring it to room temperature. Always.
Room temp dairy blends smoother and prevents lumps.
Sugar
Balances the tang of cream cheese and enhances the banana flavor.
Eggs
These bind everything together.
And here’s a crucial point:
Mix eggs on low speed.
Overmixing adds air.
Air creates bubbles.
Bubbles rise and burst.
Bursting causes cracks.
We want smooth tops. No cheesecake craters.
Bananas
Now here’s where people get surprised.
Do not use overly ripe bananas.
I use firm yellow bananas.
Why?
Super ripe bananas turn mushy and overly sweet. They can also brown too quickly inside the cheesecake.
Firm bananas hold shape and give you clean, defined layers.
Vanilla Pudding (For the Topping)
This transforms the cheesecake into a true Banana Pudding Cheesecake Recipe With Pudding.
Whipped vanilla pudding adds that classic pudding vibe while keeping the topping light and fluffy.
It’s the finishing move.
How to Make Banana Pudding Cheesecake With Wafers
Ready to build it? Let’s go step-by-step.
Step 1: Prepare the Crust
Crush your Nilla Wafers into fine crumbs.
Mix with melted butter.
Press firmly into the bottom of your springform pan.
Pack it tightly.
A loose crust crumbles.
Bake briefly to set, then cool.
This forms the base for your Banana Pudding Pie Nilla Wafer style crust.
Step 2: Mix the Cheesecake Filling
Beat room-temperature cream cheese and sugar until smooth.
Add banana flavoring or mashed banana (depending on your version).
Add eggs one at a time.
Mix on low speed. Always.
Scrape the bowl.
Keep it smooth.
Don’t whip air into it.
Step 3: Layer It Like a Pro
Pour half the cheesecake batter into the crust.
Now comes the magic.
Add:
- A layer of sliced bananas
- A generous sprinkle of crushed Nilla Wafers
This is what gives you that Banana Pudding Crunch Cheesecake effect.
It’s soft, creamy, and then—surprise—crunch.
Pour the remaining cheesecake batter on top.
Smooth it out.
Step 4: Bake and Chill
Bake until the center sets but still has a slight jiggle.
Turn off the oven and let it cool gradually.
Then refrigerate overnight.
Cooling overnight is non-negotiable.
Cheesecake needs time to firm up and develop flavor.
Trust the process.
Step 5: Add the Whipped Pudding Topping
Once fully chilled, spread whipped vanilla pudding over the top.
Smooth it out evenly.
Optional: garnish with crushed wafers or banana slices.
Now you officially have a masterpiece.
Pro Tips for Perfect Results
Let’s make sure your cheesecake looks bakery-level.
Use Room Temperature Ingredients
Cold dairy creates lumps. Period.
Don’t Overmix Eggs
Low speed. Minimal air.
Avoid Overripe Bananas
Yellow and firm works best.
Chill Overnight
Flavor improves. Texture improves. Everything improves.
Run a Knife Around the Edge After Baking
This prevents cracking as it cools.
These small details separate good cheesecake from unforgettable cheesecake.
Variations to Try
Once you master the base, you can experiment.
Turn It Into a Banana Pudding Cheesecake Pie
Want a slightly thinner dessert? Bake in a deep-dish pie pan instead.
Boom. Instant Banana Pudding Cheesecake Pie.
Add Caramel Drizzle
Drizzle caramel sauce over the pudding layer for a salted caramel twist.
Chocolate Banana Version
Add mini chocolate chips between the banana layers.
Unexpected? Yes. Delicious? Absolutely.
Extra Crunch Upgrade
Mix crushed wafers into the topping for a full Banana Pudding Nilla Wafer Dessert overload.
Because more crunch is rarely a bad idea.
Best Ways to Serve This Banana Cheesecake With Nilla Wafers
This dessert shines at:
- Holiday gatherings
- Birthday parties
- Potlucks
- Sunday dinners
- Or “I survived the week” celebrations
Serve chilled.
Slice with a warm knife for clean cuts.
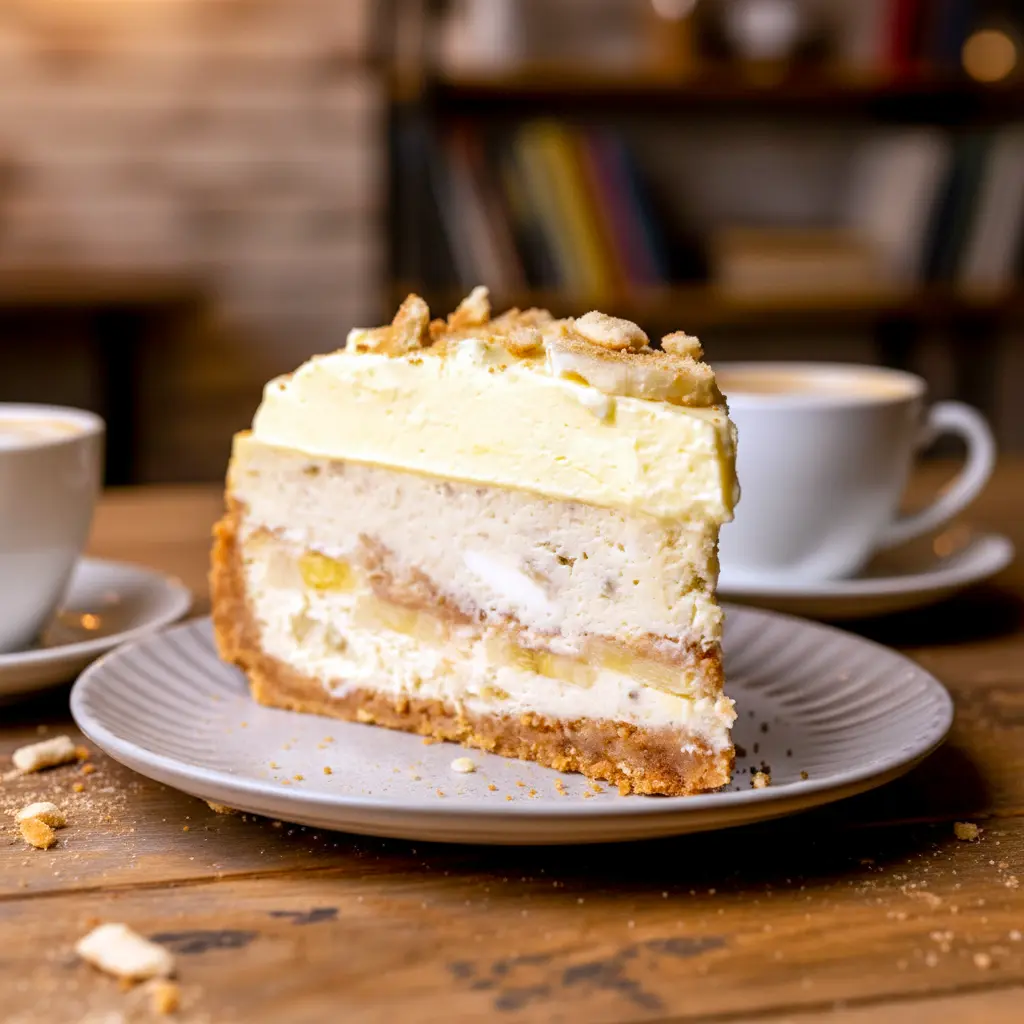
Pair with coffee or cold milk.
And watch people close their eyes after the first bite.
That’s when you know you nailed it.
Storage and Leftovers
Store covered in the refrigerator.
It stays fresh for up to 4 days.
Keep banana slices off the top until serving if you want them to look pretty.
You can freeze it, too.
Wrap tightly in plastic and foil. Freeze up to 2 months.
Thaw overnight in the fridge.
FYI: The texture stays surprisingly creamy.
FAQs
Can I Use Homemade Whipped Cream Instead of Pudding?
Yes.
But if you want that authentic banana pudding vibe, stick with pudding.
That’s what makes it a true Banana Pudding Cheesecake Recipe With Pudding.
Why Did My Cheesecake Crack?
You probably:
- Overmixed eggs
- Didn’t cool it gradually
- Skipped room temperature ingredients
Follow the tips and cracks become rare.
Can I Skip the Banana Layer Inside?
You can.
But that layered banana + wafer section is what makes this dessert unforgettable.
It turns it from cheesecake into full-on Banana Pudding Cheesecake With Wafers glory.
Is This Better Than Classic Banana Pudding?
I’ll say this carefully.
It’s richer.
It’s creamier.
It slices beautifully.
And IMO, it wins.
Why This Banana Pudding Cheesecake Works So Well
This dessert succeeds because it balances texture and flavor perfectly.
You get:
- Creamy cheesecake
- Fresh banana softness
- Cookie crunch
- Light pudding topping
Each bite delivers contrast.
That contrast keeps you going back for another forkful.
It’s structured but nostalgic. Elevated but familiar.
That’s why this Banana Cheesecake With Nilla Wafers doesn’t feel like a gimmick.
It feels like destiny.
Final Thoughts — Is It Worth Making?
If you love banana pudding, yes.
If you love cheesecake, obviously yes.
If you want a dessert that shocks people (in a good way), absolutely.
This Banana Pudding Cheesecake With Wafers isn’t just another sweet treat. It’s layered, textured, nostalgic perfection.
It combines the comfort of a Banana Pudding Pie Nilla Wafer style dessert with the richness of cheesecake and the light finish of whipped pudding.
One slice and you’ll understand.
Two slices and you’ll start planning when to make it again.
So grab those Nilla Wafers.
Pick up firm bananas.
Clear space in your fridge.
Creamy bliss is waiting. Print

Decadent Banana Pudding Cheesecake With Wafers — Creamy Bliss
- Total Time: 2 hours 25 minutes
- Yield: 16 slices 1x
Description
This rich banana cheesecake delivers all the flavor of classic banana pudding, but in thick, sliceable form. It starts with a buttery vanilla wafer crust, layers in smooth banana-infused cheesecake with fresh banana slices and cookie crumbles, and finishes with a cloud of whipped vanilla pudding on top. Every bite brings creamy texture, real banana flavor, and that nostalgic vanilla wafer crunch.
Ingredients
Vanilla Wafer Crust
- 1 box vanilla wafer cookies
- 2 tablespoons brown sugar (light or dark)
- ½ cup unsalted butter, melted
Banana Cheesecake Filling
- 24 ounces cream cheese, softened
- ¾ cup granulated sugar
- 1 teaspoon pure vanilla extract
- 2 ripe bananas, mashed until smooth
- ½ cup sour cream, room temperature
- ¼ cup heavy cream, room temperature
- 4 large eggs, room temperature
- 1 cup crushed vanilla wafers
- 2 bananas, thinly sliced
Whipped Vanilla Pudding Topping
- 1 (3.4-ounce) box instant vanilla pudding mix
- 1 cup cold milk
- 1 teaspoon pure vanilla extract
- 1 cup cold heavy cream
- Extra crushed vanilla wafers for garnish
Instructions
- Prepare the Crust
- Heat the oven to 325°F. Coat a 9-inch springform pan with nonstick spray. Line the base with a parchment circle and spray lightly again.
- Pulse the vanilla wafers in a food processor until fine crumbs form. Add brown sugar and melted butter, then blend until evenly moistened.
- Transfer the mixture to the pan. Press firmly into the bottom and slightly up the sides using the bottom of a measuring cup to compact it well.
- Bake for 11 minutes. Set aside to cool while you prepare the filling.
- Make the Banana Cheesecake
- In a large mixing bowl, beat softened cream cheese and sugar on high speed for about 2 minutes until smooth and creamy. Scrape down the bowl.
- Add the mashed bananas, vanilla extract, sour cream, and heavy cream. Mix on medium speed until blended. The mixture may look slightly textured from the bananas.
- Add eggs and mix on low speed just until incorporated. Avoid overmixing. Scrape the bowl one more time to ensure everything is evenly combined.
- Pour half of the cheesecake batter over the baked crust.
- Arrange the thin banana slices evenly over the batter. Sprinkle crushed vanilla wafers on top of the banana layer.
- Gently spread the remaining cheesecake batter over the layered filling. Smooth the top.
- Prepare a Water Bath
- Use a large roasting pan and hot water for gentle baking. Choose one of the following methods:
- Method 1 (extra protection): Place the springform pan inside a slightly larger cake pan. Set that cake pan into the roasting pan. Pour hot water into the roasting pan until it reaches halfway up the sides of the cake pan.
- Method 2 (foil wrap): Wrap the outside of the springform pan tightly with two layers of heavy-duty foil. Place it directly in the roasting pan. Add hot water halfway up the sides of the springform pan.
- Use a large roasting pan and hot water for gentle baking. Choose one of the following methods:
- Bake the Cheesecake
- Bake for 80–90 minutes. The center should have a gentle wobble, while the edges look set.
- Turn off the oven, crack the door open slightly, and allow the cheesecake to cool inside for 30 minutes.
- Remove the pan from the water bath and let it cool completely on a rack.
- Once fully cooled, cover tightly with foil and refrigerate for at least 6 hours, preferably overnight.
- Prepare the Whipped Vanilla Pudding
- In a large bowl, combine pudding mix and cold milk. Beat with a hand mixer for about 2 minutes until thickened. Chill briefly while preparing the whipped cream.
- In a separate chilled bowl, whip heavy cream and vanilla extract on high speed until stiff peaks form.
- Gently fold the whipped cream into the pudding mixture using a spatula. Fold carefully to maintain volume
- Assemble and Finish
- Remove the chilled cheesecake from the springform pan and peel away parchment paper.
- Spread the whipped pudding mixture evenly over the top.
- Sprinkle additional crushed vanilla wafers over the surface for decoration.
Notes
For best texture, take all refrigerated dairy ingredients out about 2 hours before baking so they can reach room temperature.
- Prep Time: 1 hour
- Cook Time: 1 hour 25 minutes
- Category: Desserts
Nutrition
- Calories: 370 kcal
- Sugar: 23 g
- Sodium: 189 mg
- Fat: 28 g
- Saturated Fat: 17 g
- Unsaturated Fat: 7 g
- Trans Fat: 0.2 g
- Carbohydrates: 28 g
- Fiber: 1 g
- Protein: 4 g
- Cholesterol: 82 mg


