
Alright, pumpkin lovers — this one’s for you! 🎃
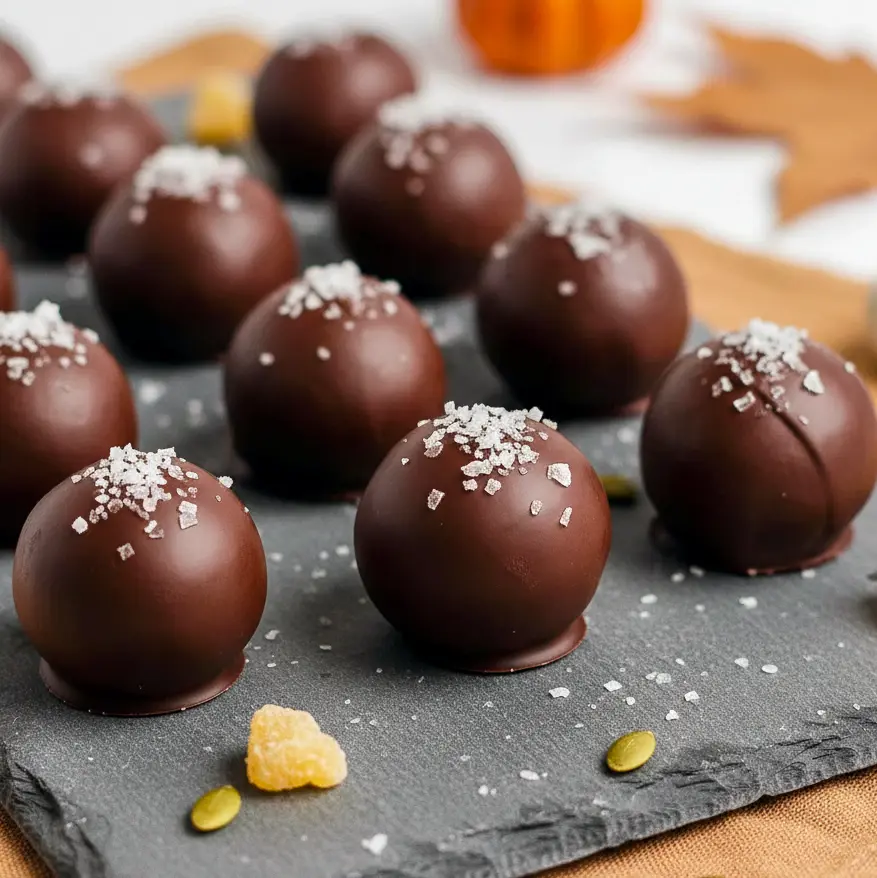
If you’ve been searching for Dairy Free Fall Treats that taste decadent but are secretly healthy, you just hit the jackpot. These Healthy Pumpkin Bites are smooth, creamy, and coated in dark chocolate perfection. They’ve got that rich, melt-in-your-mouth texture that’ll make you feel like you’re indulging in fancy chocolate shop truffles — except these are homemade, Pumpkin Sugar Free Desserts, and only 20 calories each.
Yeah, you read that right. Twenty. Calories.
They’re the kind of treat that satisfies your sweet tooth without wrecking your goals, and they fit right into any list of Clean Treats Recipes or Sugar Free Thanksgiving Recipes. Best part? They’re crazy easy to make — no baking, no butter, no cream, and definitely no refined sugar. Just pure pumpkin magic.
Why These Pumpkin Truffles Are Pure Autumn Perfection
Let’s be honest — fall and pumpkin are basically best friends. You can’t scroll Pinterest in October without seeing a dozen Pumpkin Recipes Thanksgiving style desserts staring back at you. But here’s the catch: most of them are loaded with sugar, heavy cream, and butter.
These little chocolate-coated gems? They flip that script.
Each bite tastes like pumpkin pie in truffle form — sweet, spiced, and impossibly smooth. You’ll get that warm cinnamon kick, a hint of nutmeg, and a velvety pumpkin filling that practically melts on your tongue.
What makes them extra special? They’re Flourless Pumpkin Desserts, made with wholesome ingredients you probably already have. You don’t need a mixer, stove, or any fancy equipment. Just a bowl, a fork, and about 15 minutes of your life.
Oh, and if you’re into Antiinflammatory Recipe Dessert options — you’ll love this. Pumpkin is packed with antioxidants and beta-carotene, while the spices (like cinnamon and ginger) add their own natural anti-inflammatory benefits. So yes, you can snack and feel smug about your healthy choices.
The Story Behind These Guilt-Free Pumpkin Truffles
This recipe has a fun little backstory. When I released my Healthier Chocolate Treats cookbook, I threw a launch party filled with all the chocolatey desserts my friends could handle. We’re talking brownies, cupcakes, cookies — you name it. But one guest brought me a gift that completely stole the show: a box of gourmet truffles from a local chocolate boutique.
They were pure luxury — creamy, rich, perfectly balanced. I remember thinking, “Okay, this is what happiness tastes like.”
Fast forward a few years, and while flipping through my old cookbook, I found myself craving that truffle experience again. Except now, I wanted to recreate it in a way that felt lighter, cleaner, and more festive. Cue the birth of these Pumpkin Baking Healthy truffles.
They’re inspired by that same indulgent texture and flavor — but with zero guilt attached.
Ingredients You’ll Need (and Why They Work So Well)
Alright, let’s talk building blocks. The magic of this recipe comes from a handful of simple ingredients that come together just right.
Pumpkin Purée – This is the base that gives your truffles their signature pumpkin-pie flavor. Go for canned pumpkin (not pumpkin pie filling — big difference!). The puree keeps things moist and naturally sweet.
Pumpkin Spice – You can use store-bought, but homemade is next-level. My go-to mix includes cinnamon, nutmeg, ginger, allspice, and a pinch of cloves. The combination is warm, fragrant, and just the right amount of spicy.
Liquid Stevia – A little goes a long way! This no-calorie natural sweetener adds just the right sweetness without the crash. If you prefer, you can substitute with another natural sweetener, but stevia keeps things ultra light for Sugar Free Thanksgiving Recipes.
Oat Flour – Surprise ingredient! This adds structure and makes the filling doughy enough to roll. It’s literally just finely ground oats — which means this is one of those Flourless Pumpkin Desserts that still has amazing texture.
Dark Chocolate – You want a rich, slightly bitter chocolate to balance the sweet pumpkin filling. Ghirardelli or Lindt bars melt beautifully for dipping — skip the chips (they don’t melt as smooth).
Flaky Sea Salt – Totally optional, but highly recommended. That little sprinkle on top? Game changer. It adds a touch of sophistication and makes every bite pop.
How To Make Healthy Pumpkin Truffles
Making these Dairy Free Fall Treats is ridiculously easy — no oven, no mess, no stress. Here’s how you do it:
1. Make the Pumpkin Filling
In a bowl, mix your pumpkin purée, pumpkin spice, sweetener, and a small pinch of salt. Stir well until smooth. Add oat flour, one spoonful at a time, until the mixture forms a soft dough that you can roll between your palms.
If it feels sticky, rub a little neutral oil on your hands — it’ll help shape the truffles easily.
Pro tip: Press your dough flat in the bowl, slice it into 8 wedges like a pie, and roll 3 balls from each wedge for perfectly even truffles.
2. Chill the Filling
Pop the rolled pumpkin balls onto a parchment-lined tray and chill them in the fridge for about 10–15 minutes. This helps them firm up and makes dipping easier later.
3. Melt the Chocolate
Melt your dark chocolate in short bursts in the microwave, stirring in between until smooth. You want it glossy and thin — not thick or goopy.
Avoid chocolate chips — they have stabilizers that make melting uneven.
If you’re fancy (or just clever), keep your bowl of chocolate warm by placing it on a towel over a heated panini press or griddle — it keeps the chocolate silky for perfect coating!
4. Dip and Decorate
Drop one pumpkin ball into the melted chocolate, swirl it around with a fork, then lift it out and let the excess drip off. Gently place it on the lined tray.
Once all your truffles are coated, let them set for a few minutes before sprinkling with flaky salt. That way, the salt sticks without melting away.
5. Chill and Enjoy
Slide your tray into the fridge for about 30 minutes, or until the chocolate shell hardens. Try not to eat them all before they set (no promises).
Pro Tips for Perfect Pumpkin Truffles
- Use real pumpkin purée, not pumpkin pie mix. The mix has added sugar and spices that’ll throw off your balance.
- Homemade pumpkin spice = flavor control. Adjust the spice ratio to your liking — extra cinnamon for warmth or more ginger for zing.
- Keep your chocolate thin. Thick chocolate makes messy coatings. A few drops of coconut oil can help thin it out if needed.
- Temperature matters. Warm chocolate + chilled truffle filling = smooth coating.
- Work quickly! Once chocolate starts cooling, dipping gets tricky.
Fun Variations to Try
Think of this recipe as your pumpkin base — now let’s dress it up!
- Pumpkin Mocha Truffles: Add a bit of instant espresso powder to the filling for a coffee kick.
- Maple Pumpkin Truffles: Swap stevia for a drizzle of pure maple syrup for a more classic fall vibe.
- Crunchy Coating: Roll the finished truffles in crushed nuts or shredded coconut instead of chocolate.
- White Chocolate Drizzle: After dipping in dark chocolate, flick on some melted dairy-free white chocolate for that “boutique dessert” look.
Best Way To Serve These Little Beauties
These Clean Treats Recipes look stunning on a dessert platter. I love serving them alongside a cup of coffee or chai — the spices play so well together.
They also make perfect edible gifts. Pack them in little paper cups or boxes with a cute ribbon, and suddenly you’ve got a fancy Pumpkin Baking Healthy gift that costs pennies compared to store-bought truffles.
If you’re planning a fall gathering, add them to your Pumpkin Recipes Thanksgiving dessert table — they’ll disappear faster than pie.
Storage & Make-Ahead Tips
- Refrigerate: Store in an airtight container in the fridge for up to a week.
- Freeze: Freeze for up to 3 months — just thaw in the fridge overnight before serving.
- Meal Prep Tip: Make the filling ahead and store it in the fridge. Roll and coat the truffles the day you need them for ultimate freshness.
Frequently Asked Questions
Can I make these without stevia?
Yes! You can use maple syrup, honey, or monk fruit sweetener instead. Just adjust the oat flour slightly if the mixture gets too soft.
Can I make them vegan?
Totally — just make sure your chocolate is dairy-free. Most dark chocolate 70% and above works perfectly.
Can I use almond flour instead of oat flour?
You can, but the texture will be softer. Oat flour gives these truffles a classic “doughy” bite.
How long do they last?
Up to a week in the fridge… if they last that long. 😉
Are they actually healthy?
Oh, 100%! Between the pumpkin, spices, and dark chocolate, these Antiinflammatory Recipe Dessert truffles are nutrient-packed, low in sugar, and totally clean-eating approved.
Final Thoughts
There’s something special about fall baking — that cozy aroma of pumpkin spice, the feeling of wrapping up in a blanket while something delicious chills (or bakes) in the kitchen. These Dairy Free Fall Treats bring that vibe without the fuss or guilt.
They’re creamy, sweet, chocolatey, and feel like a tiny celebration in every bite. Whether you’re prepping Sugar Free Thanksgiving Recipes, looking for Flourless Pumpkin Desserts, or just need a little afternoon pick-me-up, these Healthy Pumpkin Bites check all the boxes.
So grab your whisk (okay, your fork), throw on your coziest sweater, and whip up a batch. You deserve a truffle that tastes indulgent — and secretly does your body good, too.
Happy pumpkin season! 🎃🍫 Print

Dairy Free Fall Treats – These Healthy Pumpkin Truffles Are Pure Bliss!
- Yield: 24 truffles 1x
Description
If you’re looking for a little bite of fall magic, these healthy pumpkin truffles are the treat for you. They taste like mini pumpkin pies wrapped in a dark chocolate shell — fancy enough to pass as gourmet chocolates, but secretly wholesome and super easy to make. Each truffle is perfectly spiced, lightly sweet, and rich in flavor.
Oh, and here’s the best part — they’re dairy free, made with simple ingredients, and still feel completely indulgent. Once chilled, they get that perfect soft center that melts in your mouth. Honestly, they’re so good you’ll have a hard time believing they’re made without butter, cream, or sugar.
These beauties will stay fresh for up to five days in the fridge (if they last that long!). You can leave them uncovered or pop them in an airtight container — both work just fine.
Ingredients
For the Pumpkin Filling:
- ½ cup (122g) pure pumpkin purée (make sure it’s not pumpkin pie mix!)
- 1 ¼ teaspoons homemade pumpkin spice (see notes below)
- ⅛ teaspoon salt
- ¾ teaspoon liquid stevia (adjust to your liking)
- ¾ cup (90g) oat flour (use gluten-free if needed and measure carefully)
For the Chocolate Coating:
- ¼ cup (54g) chopped dark chocolate (see notes for the best melting options)
- Optional: flaky sea salt, for topping — totally optional, but highly recommended for that extra “gourmet” touch!
Instructions
- Prep Your Tray
- Line a baking sheet with parchment or wax paper. This keeps your truffles from sticking later and makes clean-up a breeze.
- Make the Pumpkin Filling
- Grab a medium mixing bowl and stir together your pumpkin purée, pumpkin spice blend, salt, and liquid stevia until smooth. Add the oat flour next and mix until everything comes together into a soft, doughy texture.
- Shape the Truffles
- Scoop out a small amount of the pumpkin mixture and roll it into bite-sized balls using your hands. (If the dough feels a little sticky, rub a drop of neutral oil on your palms — it helps a ton.) Arrange each rolled truffle on the prepared tray. Repeat until you’ve used up all the filling.
- Melt the Chocolate
- Place your chopped dark chocolate in a microwave-safe bowl. Microwave it for 30 seconds on high, then stir well for about a minute. Continue heating in 10-second bursts, stirring between each one, until the chocolate is completely smooth and glossy.
- Pro tip: Keep the chocolate warm while you work — it makes dipping much easier. (See the note below for how to do this like a pro!)
- Dip and Coat
- Drop one pumpkin ball into the melted chocolate and roll it around gently using two forks until fully coated. Lift it out, let any extra chocolate drip off, then place it back on the tray. Sprinkle a little flaky sea salt on top before the chocolate sets for that dreamy sweet-and-salty combo. Repeat with the remaining truffles.
- Chill and Set
- Pop the tray in the freezer for 5–10 minutes or in the fridge for 15–20 minutes until the chocolate hardens. Once they’re firm, you can store them in the refrigerator until it’s snack time.
Notes
Measuring Oat Flour (Important!)
- Too much flour will dry out your filling and make it crumbly. Always measure correctly — spoon the oat flour into your measuring cup and level it off with a knife, or use a kitchen scale. If your dough ends up too dry, add milk (any kind!) one teaspoon at a time until it comes together.
Homemade Pumpkin Spice Blend
- Mix together: ¾ tsp cinnamon, ⅛ tsp allspice, ⅛ tsp ground ginger, ⅛ tsp nutmeg, ⅛ tsp cloves
- This homemade mix gives a stronger, cozier flavor than most store-bought versions, which are often heavy on cinnamon and light on everything else.
Sweetener Options
- Liquid stevia keeps these truffles sugar-free, but you can swap it if you like. For a different flavor, replace it with ¼ cup (48g) of coconut sugar, brown sugar, or powdered sugar. If you make the swap, you might need a bit more oat flour to balance the texture. Just note — they’ll be slightly less sweet, more like a soft muffin bite than candy.
Flour Substitutes
- Any flour except coconut flour can replace oat flour in this recipe. Almond, all-purpose, or gluten-free blends will work fine — though texture may vary slightly.
Chocolate Tips
- Stick to dark chocolate bars, not chips! Chips have stabilizers that keep them from melting smoothly. Brands like Ghirardelli or Lindt melt beautifully thin and glossy — exactly what you want for perfect coating. Avoid milkier bars like Hershey’s or Cadbury, which turn too thick when melted.
Finishing With Sea Salt
- This step isn’t mandatory but highly encouraged — that sprinkle of flaky sea salt adds serious flavor contrast and looks stunning. Crush large flakes between your fingers before adding. Wait a minute or two after dipping (so the chocolate starts to set slightly) before sprinkling, or the salt may dissolve.
Keeping Chocolate Warm While Dipping
- Here’s a little hack I swear by: place a folded washcloth on a warm electric griddle or metal panini press (set on low), then rest your bowl of melted chocolate on top. It’ll stay warm and perfectly smooth while you dip. If you just leave it on the counter and reheat periodically, your coating might turn speckled.
Storage Tips
- Keep your truffles chilled in the fridge. They’ll stay delicious for at least 5 days — though let’s be real, they rarely make it that long. You can even freeze them for up to 2 months and thaw as needed for an instant fall treat fix.


