
Chocolate Peanut Butter Rice Krispie Cups are the kind of snack that instantly lights up your day. You know those treats that are so easy to make, you almost feel guilty about how impressive they look? Yeah, this is one of those. No oven, no complicated steps—just good old-fashioned melt, mix, and chill magic. The combo of chocolate, peanut butter, and crispy cereal is a total win, and once you’ve made them, you’ll wonder how you ever lived without a batch stashed in your fridge.
So grab your mixing bowl and let’s make some sweet, crunchy happiness.
Introduction to the Recipe
There’s something nostalgic about the first bite of Chocolate Peanut Butter Rice Krispy Cups. Maybe it’s the satisfying crunch of the cereal, or the way the creamy peanut butter blends perfectly with rich melted chocolate. Whatever it is, it’s pure comfort disguised as a bite-sized dessert.
These little gems are ideal for any season—summertime snacks, cozy winter nights, or part of your Christmas Candy Recipes lineup. They’re simple enough for a casual treat but polished enough to serve at a get-together.
The best part? You don’t need to be a kitchen pro. If you can stir and pour, you can make these.
What Makes This Recipe So Irresistible
Let’s be real: Cereal Treats have been around forever, but these take the concept to a whole new level. You get three unbeatable layers of texture and flavor—smooth, crunchy, and melt-in-your-mouth delicious.
Here’s what makes them such a crowd-pleaser:
- No baking required. (That’s right—keep the oven off and your kitchen cool.)
- Five basic ingredients. Nothing fancy, just pantry staples you probably already have.
- Customizable. You can make them vegan, gluten-free, or even toss in some flair with your favorite mix-ins.
- Perfectly portable. Lunchboxes, dessert tables, or a Netflix marathon—these fit every occasion.
They’re also the ultimate mash-up of two dessert worlds: classic Krispie Treats Recipe meets peanut butter cup. It’s crunchy meets creamy meets “Oh my gosh, give me another one.”
A Little Backstory: The Magic of Rice Krispie Treats
Before we dive into melting chocolate, let’s take a quick stroll down memory lane. The first Rice Krispie Treats popped up in 1939 when Kellogg’s inventors created the simple combo of cereal, butter, and marshmallows. It was genius. Cheap, easy, and instantly addictive.
Fast-forward a few decades, and people started getting creative. Enter Peanut Butter Recipes, chocolate drizzles, and eventually, these glorious Chocolate Peanut Butter Rice Krispie Cups. They’re basically the cooler, modern cousin of the original—less bake sale, more “hey, I could totally post this on Instagram.”
Ingredients You’ll Need
Alright, let’s get down to the fun part—the ingredients. This is the easy, breezy kind of Dessert Bar Recipe that makes your kitchen smell amazing with minimal effort.
You’ll need:
- Crispy rice cereal – The base that gives you that light, satisfying crunch.
- Peanut butter – Creamy is classic, but if you like more bite, go for crunchy. It adds richness and helps everything stick together.
- Butter – A little bit goes a long way for smoothness and that buttery flavor we all secretly love.
- Mini marshmallows – They’re the glue that keeps the cereal bound and chewy.
- Chocolate chips – Because no great story ever started with “I decided not to add chocolate.”
Optional but worth it:
- A drizzle of caramel or melted white chocolate on top.
- A pinch of flaky sea salt (trust me, it takes these to fancy-dessert status).
- Sprinkles, crushed pretzels, or even mini peanut butter cups for texture and flair.
How to Make Chocolate Peanut Butter Rice Krispie Cups
Ready? Here’s the simple breakdown—no stress, no mess.
Step 1: Melt the marshmallow mixture
In a saucepan, melt butter and marshmallows over low heat, stirring until smooth. Once melted, add the peanut butter and stir again until you’ve got a glossy, creamy mix.
Step 2: Mix it up
Pour the cereal into a large bowl, then add your warm peanut butter mixture. Stir until the cereal is evenly coated—but gently, so you don’t crush it.
Step 3: Form the cups
Line a muffin tin with paper liners. Scoop the mixture in, pressing down gently to make a shallow cup shape. Leave a little space for that dreamy chocolate layer.
Step 4: Add the chocolate layer
Melt your chocolate chips in the microwave in 20-second bursts, stirring in between. Once smooth, spoon it over each cup. Don’t drown them—just enough to coat the top.
Step 5: Let them set
Pop the tray into the fridge for 20–30 minutes. When the chocolate is firm, peel off the liners and—boom!—dessert perfection.
Pro Tip:
If you want glossy chocolate that doesn’t melt at room temp, stir in a teaspoon of coconut oil while melting. It gives the topping that professional finish.
The Story Behind the Flavor
Peanut butter and chocolate are like the rom-com couple of desserts: always meant to be. Add that satisfying crunch from rice cereal, and you’ve got a trio that checks every box—sweet, salty, creamy, crispy.
This recipe also taps into nostalgia. Remember those gooey squares from your childhood? These cups feel grown-up without losing that cozy, playful vibe. They’re the kind of Homemade Candies that bring people together—especially around the holidays, when everyone’s sneaking “just one more.”
And yes, they totally count as part of your Candy Recipes Homemade repertoire. A few batches of these wrapped in cellophane and ribbon make adorable edible gifts.
Pro Tips for the Best Outcome
Want your Chocolate Peanut Butter Rice Krispy Cups to turn out bakery-level amazing? Here are a few insider tricks:
- Don’t rush the melting. Keep the heat low when melting the marshmallows and butter. High heat can scorch them and change the texture.
- Use fresh cereal. Stale cereal = sad, chewy cups.
- Work quickly. Once you add the cereal to the mixture, move fast—it starts to set as it cools.
- Press, don’t smash. Firm pressure will shape them nicely, but pressing too hard can make them dense instead of airy.
- Cool completely. Let the chocolate set fully before removing from liners or stacking them. Patience pays off here!
Bonus tip: Want an extra hit of “wow”? Sprinkle crushed peanuts or sea salt on top of the chocolate before it hardens. It gives a little crunch and looks fancy without any effort.
Variations to Try
Because let’s be honest—you’ll want to make these again and again, so why not mix things up?
- Dark Chocolate Dream: Swap the milk chocolate for dark. Rich, slightly bitter, and perfect if you like your sweets more refined.
- Nutty Crunch: Add chopped almonds, pecans, or pretzels to the mix for texture that’ll make snack time exciting.
- S’mores Edition: Stir in mini marshmallows and drizzle with melted chocolate and crushed graham crackers. Campfire vibes, zero cleanup.
- Holiday Cheer: For your next Christmas Candy Recipes lineup, add red and green sprinkles or drizzle white chocolate for a festive touch.
These cups are endlessly customizable. IMO, that’s half the fun—you can turn the same base into a dozen different desserts.
Best Way to Serve
Honestly, these treats are so good they rarely make it to the “serving” stage before being devoured. But if you want to elevate presentation:
- Serve them on a tiered dessert tray next to truffles and fudge for a Dessert Chocolat moment.
- Pair them with hot cocoa, coffee, or even a glass of cold milk (classic never goes out of style).
- Chop them into bite-sized squares and add to an assorted Dessert Bar Recipe spread.
They’re also great lunchbox surprises or late-night snacks—you know, the “just one more before bed” kind.
Quick Tips for Storage and Leftovers
Made too many? (Is that even possible?) Here’s how to keep them fresh:
- Room temperature: Store in an airtight container for up to 4–5 days.
- Fridge: Keeps them firmer—especially in warm weather.
- Freezer: Yep, they freeze beautifully! Layer them between sheets of parchment in a sealed container and freeze for up to a month.
When ready to eat, just thaw for 10 minutes and they’ll be as chewy and crisp as day one.
FAQs About Chocolate Peanut Butter Rice Krispie Cups
Can I use natural peanut butter?
You can, but keep in mind natural peanut butter separates more easily. Stir it well before using, or your cups might turn oily.
Can I make these without marshmallows?
Sure! Try marshmallow fluff or even honey as a binder. The texture will be slightly different, but still delicious.
What if I only have crunchy peanut butter?
Go for it! It adds a fun texture twist and extra nutty flavor.
Can I double the batch?
Absolutely. Just make sure your saucepan and mixing bowl are large enough to handle the extra volume.
Do these make good gifts?
Oh, totally. Wrap them individually in mini cupcake liners, place them in a cute tin, and boom—homemade happiness in gift form. Perfect for teachers, neighbors, or your “just one bite” friend.
Final Thoughts
At the end of the day, Chocolate Peanut Butter Rice Krispy Cups are proof that simple ingredients can create extraordinary results. They hit all the right notes—sweet, salty, crunchy, and oh-so-creamy. Whether you’re craving an afternoon pick-me-up, experimenting with Candy Recipes Homemade, or building a spread of Homemade Candies for the holidays, these little treats deliver every single time.
They also serve as a reminder that dessert doesn’t need to be complicated. A little peanut butter, some cereal, and melted chocolate can turn an ordinary day into something special.
So next time that sweet craving hits, skip the store-bought candy and whip up a batch of these instead. They’re fun to make, ridiculously tasty, and—fair warning—totally addictive. Print

Chocolate Peanut Butter Rice Krispie Cups – Sweet, Crunchy & Totally Addictive!
- Total Time: 20 minutes
- Yield: 20 servings 1x
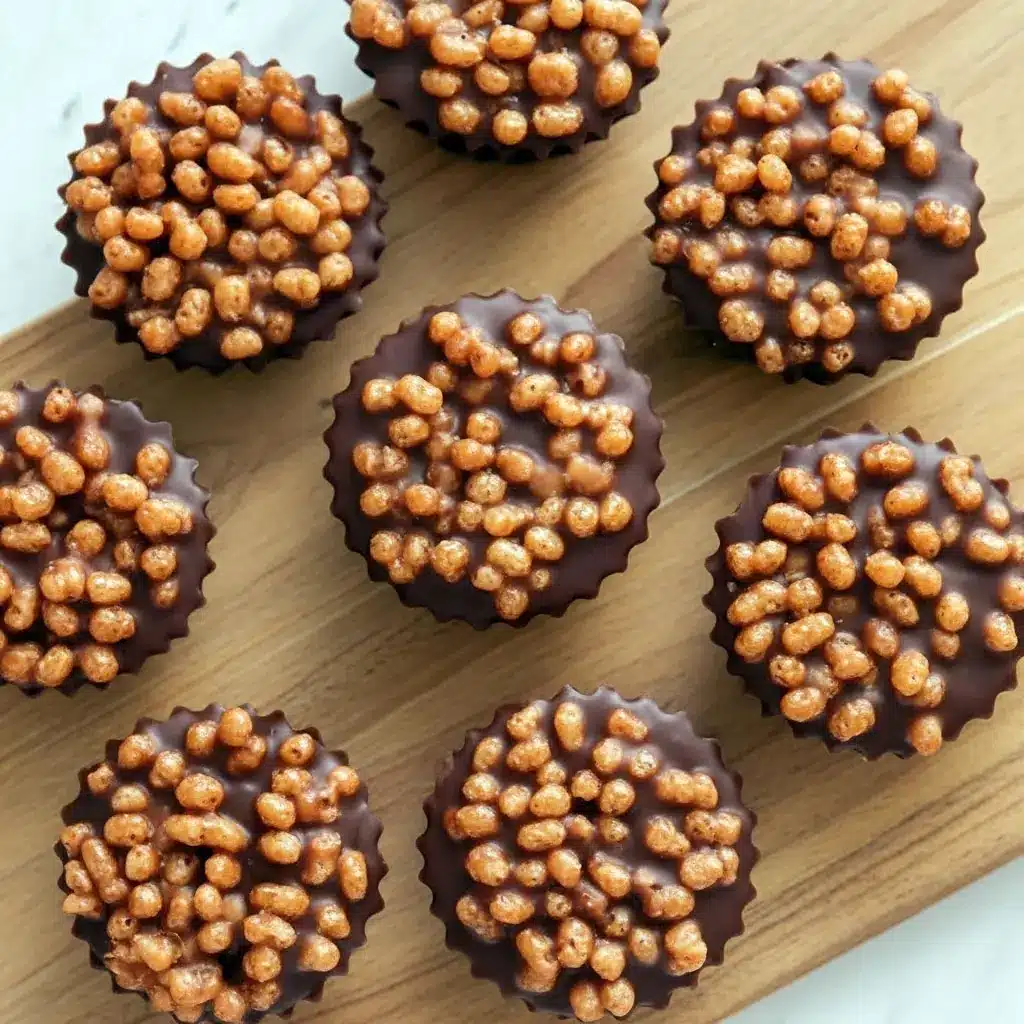
Description
Get ready to fall in love with the easiest no-bake dessert ever! These Chocolate Peanut Butter Rice Krispie Cups are a sweet little symphony of flavors and textures — creamy peanut butter, rich chocolate, and that oh-so-satisfying crispy crunch. They come together in no time, need zero baking, and taste like pure joy. Perfect for parties, afternoon cravings, or just because you deserve a treat.
Ingredients
- 3 cups Rice Krispies cereal
- 1 cup creamy peanut butter
- ½ cup unsalted butter
- 1 cup mini marshmallows
- 1 cup chocolate chips
- ½ teaspoon vanilla extract (optional)
- A pinch of sea salt (optional, but so good on top)
Instructions
- Melt the Good Stuff:
- Grab a medium saucepan and place it over low heat. Add the butter and marshmallows, stirring constantly until everything melts together into a silky, smooth base.
- Stir in the Peanut Butter:
- Once the marshmallows are fully melted, mix in the peanut butter (and vanilla, if you’re using it). Keep stirring until you’ve got a luscious, creamy mixture that smells incredible.
- Combine with Cereal:
- In a large bowl, pour in your Rice Krispies. Add the warm peanut butter mixture and gently fold everything together until the cereal is evenly coated. Work quickly so it doesn’t start setting too soon!
- Form the Cups:
- Line a muffin tin with paper liners. Spoon the mixture into each liner, pressing lightly with the back of a spoon to shape and flatten the tops. Don’t pack them down too tightly — you want that crisp, airy crunch to stay intact.
- Add the Chocolate Topping:
- In a microwave-safe bowl, melt your chocolate chips in 20-second bursts, stirring between each until smooth. Spoon a layer of melted chocolate over each cup and spread it evenly. Sprinkle a touch of sea salt on top if you’re feeling fancy.
- Let Them Set:
- Leave the cups to cool at room temperature for about 20 minutes, or pop them into the fridge for faster setting. Once the chocolate has firmed up, peel away the liners and dig in!
Notes
- ✨ Keep the heat gentle. Melting the butter, marshmallows, and peanut butter over low heat ensures everything blends smoothly without burning or seizing.
- ✨ Don’t overpress. A light touch keeps the Rice Krispies from getting crushed — you want that signature airy crunch in every bite.
- ✨ Chill before serving. Letting the chocolate layer set completely makes it easier to handle and gives that perfect snap when you bite in.
- Prep Time: 10 minutes
- Cook Time: 10 minutes
- Category: Desserts


