
If you’ve ever dreamed of a dessert that tastes like classic banana pudding and rich cheesecake had a wildly delicious love child, Banana Pudding Cheesecake With Wafers is exactly that fantasy come true. Creamy. Crunchy. Nostalgic. A little over-the-top in the best way possible. And honestly? It might ruin regular banana pudding for you forever—fair warning.
This isn’t just another cheesecake pretending to be fancy. This is full-on comfort dessert energy with layers of flavor that hit every note: sweet bananas, vanilla, buttery wafers, and that ultra-smooth cheesecake filling we all secretly judge other desserts against. One bite and you’re thinking, “Why haven’t I been making this my whole life?”
So grab your springform pan, clear some fridge space, and let’s talk about why this dessert deserves a permanent spot in your recipe rotation.
Why Banana Pudding Cheesecake With Wafers Is Pure Dessert Gold
Let’s be real—banana pudding already has a cult following. Cheesecake? Same story. Combine them, and you’ve got a dessert that feels familiar yet wildly indulgent.
Here’s why people lose their minds over this recipe:
- It tastes like banana pudding, but better. The cheesecake base adds richness that regular pudding can only dream of.
- Textures for days. Creamy filling, soft banana slices, crunchy wafers—every bite keeps things interesting.
- It looks impressive without being fussy. This is a showstopper that doesn’t require pastry-school energy.
- Perfect make-ahead dessert. IMO, desserts that get better overnight are elite-tier.
If you love layered desserts and nostalgic flavors, this Banana Pudding Cheesecake Recipe With Pudding is going to feel like it was made specifically for you.
The Story Behind This Cheesecake (AKA: How Banana Pudding Leveled Up)
This recipe started the way many great desserts do—someone standing in the kitchen thinking, “What if we just… added cheesecake?”
Classic banana pudding has always been comforting, but it’s also soft all the way through. Delicious, yes. Exciting? Sometimes not. Enter cheesecake. Dense, creamy, rich, and sturdy enough to support layers of bananas and cookies without turning into mush.
By building this dessert like a Banana Pudding Cheesecake Pie, you get structure, flavor, and balance. The wafers stay crisp in the crust, the bananas stay fresh between layers, and the pudding topping adds that final nostalgic flourish.
It’s familiar. It’s indulgent. It’s just different enough to feel special.
Ingredients Breakdown (And Why Each One Matters)
This dessert shines because every ingredient pulls its weight. No fillers. No fluff. Just smart layering.
Nilla Wafer Crust
This is the foundation of your Banana Cheesecake With Nilla Wafers, and it matters more than you think.
- Nilla Wafers: Buttery, vanilla-forward, and nostalgic. Don’t substitute unless you absolutely must.
- Brown Sugar: Adds depth and warmth that white sugar alone can’t deliver.
- Melted Butter: Holds everything together and keeps the crust crisp.
Pro tip: Press the crust halfway up the pan. It gives that bakery-style look and supports the filling beautifully.
Banana Cheesecake Filling
This is where the magic really happens.
- Cream Cheese: Full-fat only. This isn’t the time to cut corners.
- Granulated Sugar: Sweetens without overpowering the bananas.
- Mashed Bananas: These flavor the cheesecake itself—this isn’t just banana “adjacent.”
- Sour Cream & Heavy Cream: Creaminess squared. These keep the texture smooth, not dense.
- Eggs: Structure without toughness—low speed is key here.
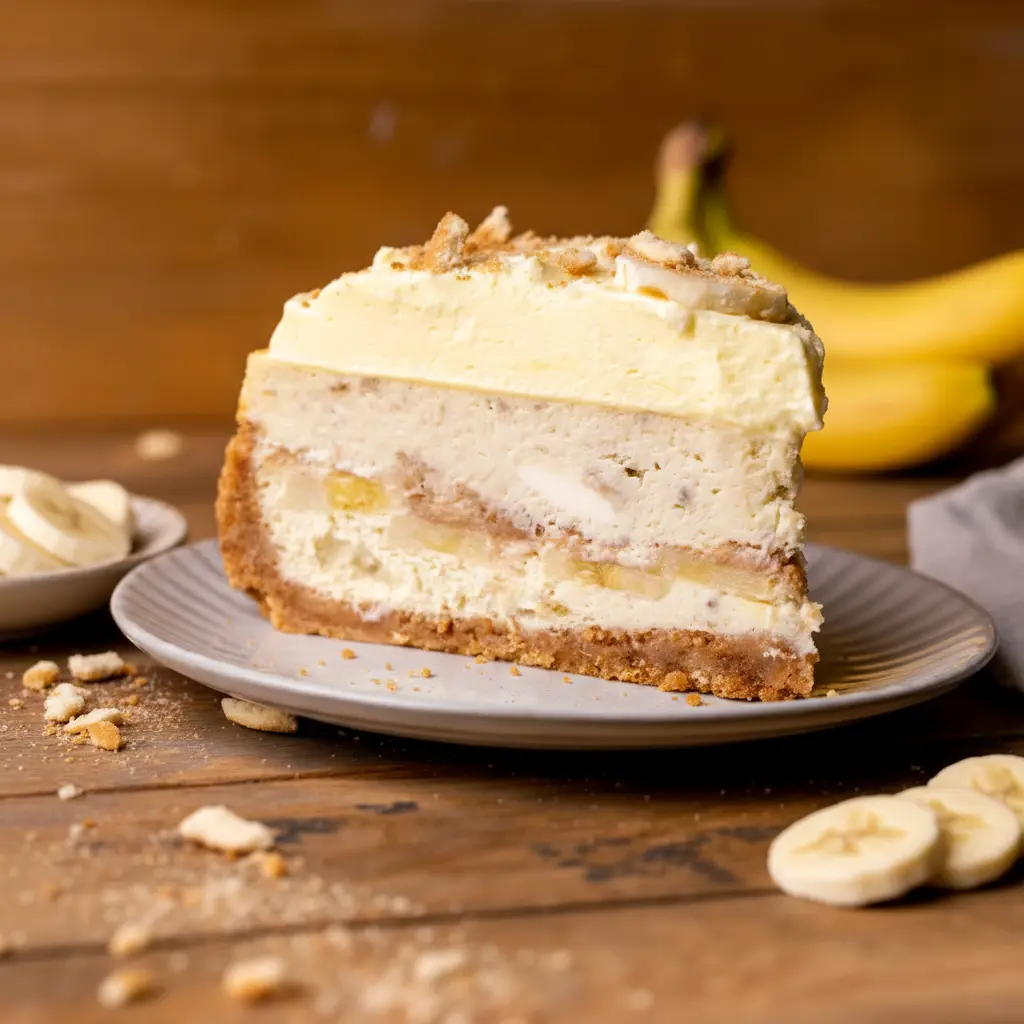
- Crushed Wafers & Banana Slices: These layers create that signature Banana Pudding Crunch Cheesecake vibe.
FYI: Use yellow bananas, not overripe. Too ripe = overpowering flavor and excess moisture.
Whipped Vanilla Pudding Topping
This layer takes the dessert from great to unforgettable.
- Instant Vanilla Pudding: Classic banana pudding energy.
- Cold Milk: Helps the pudding set properly.
- Whipped Heavy Cream: Lightens the pudding and adds volume.
- Extra Vanilla: Because more vanilla is never a bad idea.
This topping turns the cheesecake into a true Banana Pudding Dessert With Nilla Wafers experience.
How to Make It (Without Stressing Yourself Out)
This recipe looks impressive, but the process stays very doable if you take it step by step.
Step 1: Build the Crust
Crush the wafers finely. Mix with brown sugar and melted butter. Press firmly into your pan and bake briefly to set.
Key tip: Compact the crust well. Loose crumbs = sad slices later.
Step 2: Mix the Cheesecake Filling
Beat the cream cheese and sugar until smooth. Add mashed bananas, vanilla, sour cream, and cream. Then—very important—add the eggs on low speed.
Why? Overmixing eggs adds air. Air leads to cracks. Cracks are the enemy.
Step 3: Layer Like a Pro
Pour in half the batter. Add banana slices and crushed wafers. Top with the remaining batter.
This layered approach is what separates a basic cheesecake from a true Banana Pudding Nilla Wafer Dessert masterpiece.
Step 4: Water Bath + Slow Bake
Yes, the water bath matters. It keeps the bake gentle and even.
Bake until the edges set and the center still has a slight jiggle. Then let it cool slowly in the oven before chilling overnight.
Patience here pays off big time.
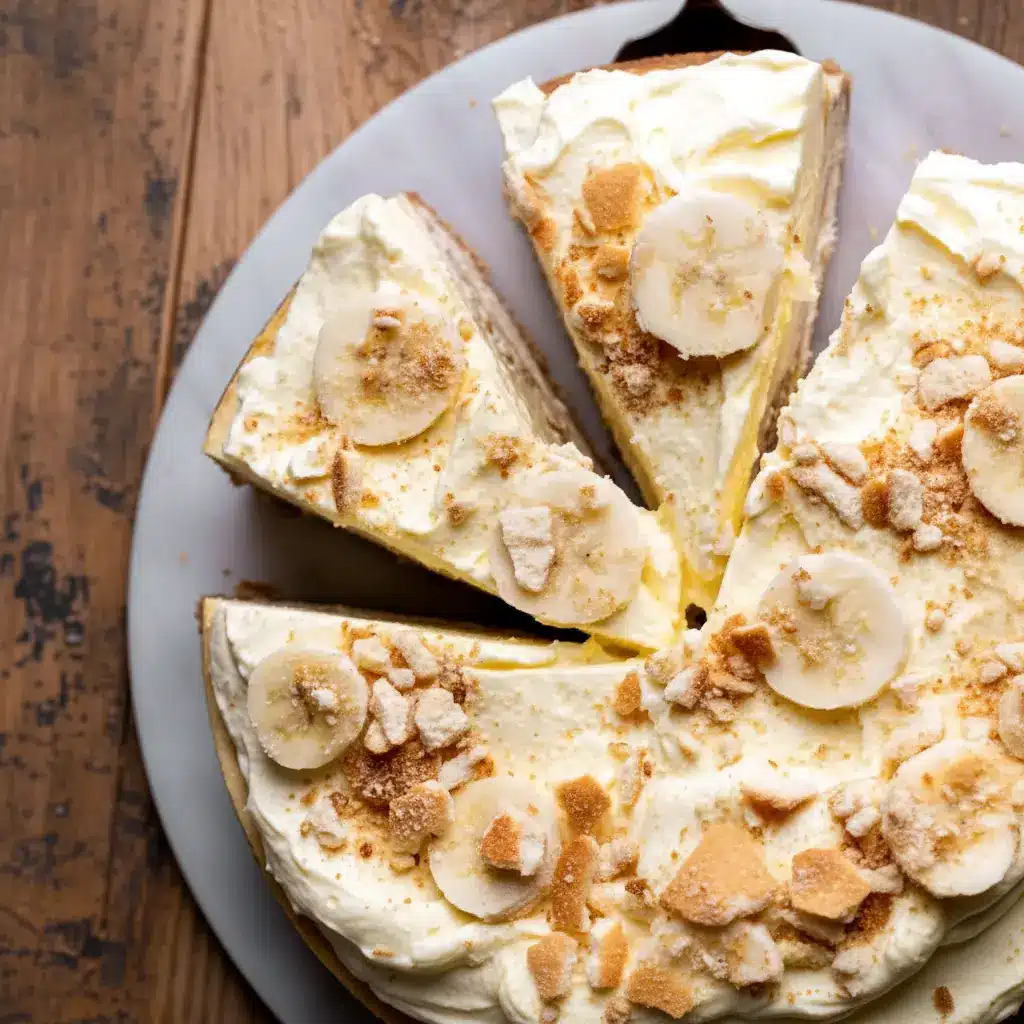
Step 5: Finish with Pudding Perfection
Once chilled, top the cheesecake with whipped vanilla pudding and a generous sprinkle of crushed wafers.
This final layer turns it into a full-on Banana Pudding Cheesecake Pie moment.
Pro Tips for a Perfect Cheesecake (Don’t Skip These)
- Room-temperature dairy is non-negotiable. Cold ingredients = lumpy batter.
- Mix eggs gently. Low speed, minimal mixing.
- Avoid ripe bananas. Sweet, but too soft and watery.
- Chill overnight. Six hours minimum, overnight is best.
- Use a sharp, warm knife to slice. Clean cuts matter.
Trust the process. Cheesecake rewards patience.
Fun Variations to Try
Want to mix things up? This recipe plays well with tweaks.
- Add caramel drizzle for a banana foster vibe.
- Swap vanilla pudding for banana pudding.
- Add a thin chocolate ganache layer for a chocolate-banana twist.
- Turn it into mini cheesecakes for parties.
Each variation still keeps that Banana Pudding Cheesecake Recipe With Pudding soul intact.
Best Ways to Serve This Dessert
Serve slices chilled with:
- Extra whipped cream
- Fresh banana slices
- Crushed wafers on the plate
- A drizzle of caramel or chocolate
This dessert shines on holidays, potlucks, birthdays, or random Tuesdays when you just need something amazing.
Storage & Leftovers (If There Are Any)
- Refrigerate tightly wrapped for up to 4 days.
- Keep toppings covered to prevent drying.
- Do not freeze—the texture won’t survive it.
Real talk: leftovers rarely last that long.
FAQs
Why did my cheesecake crack?
Most likely overmixed eggs or skipped water bath.
Can I make this ahead?
Yes—and you should. It’s better the next day.
Can I use instant banana pudding instead of vanilla?
Absolutely. It boosts the banana flavor even more.
Is this a traditional cheesecake?
Not exactly—and that’s why it’s so good.
Final Thoughts
This dessert isn’t just another cheesecake—it’s an experience. Rich, nostalgic, creamy, crunchy, and completely indulgent, this Banana Pudding Cheesecake Reciped (yes, it’s that good it deserves repeating) bridges the gap between comfort food and celebration dessert effortlessly.
If banana pudding has a special place in your heart, this cheesecake is about to move in rent-free. Bake it once, and you’ll understand why people keep calling it their new favorite dessert.
Ready to wow your crowd? Yeah—you’ve got this. 🍌🍰 Print

Creamy Banana Pudding Cheesecake Recipe with Pudding & Wafers
- Total Time: 2 hours 25 minutes
- Yield: 16 slices 1x
Description
This dessert is what happens when classic banana pudding decides to glow up as a cheesecake. You get a buttery vanilla wafer base, a smooth banana-infused cheesecake center layered with real bananas and cookie crunch, and a fluffy vanilla pudding topping that seals the deal. It’s rich, nostalgic, and seriously hard to stop eating.
Ingredients
Vanilla Wafer Crust
- 1 standard box vanilla wafer cookies
- 2 tablespoons packed brown sugar (light or dark both work)
- ½ cup melted unsalted butter
Banana Cheesecake Filling
- 24 ounces full-fat cream cheese, softened
- ¾ cup granulated sugar
- 1 teaspoon vanilla extract
- 2 ripe yellow bananas, mashed smooth
- ½ cup sour cream, room temperature
- ¼ cup heavy cream, room temperature
- 4 large eggs, room temperature
- 1 cup crushed vanilla wafers
- 2 bananas, thinly sliced
Whipped Vanilla Pudding Topping
- 1 box (3.4 oz) instant vanilla pudding mix
- 1 cup cold milk
- 1 teaspoon vanilla extract
- 1 cup cold heavy cream
- Extra crushed vanilla wafers for garnish
Instructions
- Prepare the Wafer Crust
- Heat the oven to 325°F. Lightly grease a 9-inch springform pan, line the bottom with parchment paper, then spray again for extra insurance.
- Pulse the vanilla wafers in a food processor until finely ground. Add the brown sugar and melted butter, then blend until the crumbs resemble damp sand.
- Press the mixture firmly into the bottom of the pan and about halfway up the sides. Use the bottom of a measuring cup to really pack it in.
- Bake the crust for 11 minutes, then set aside while you make the filling.
- Make the Banana Cheesecake
- In a large mixing bowl, beat the cream cheese and sugar on high speed for about 2 minutes until completely smooth. Scrape down the bowl so everything blends evenly.
- Stir in the mashed bananas, vanilla, sour cream, and heavy cream. Mix on medium speed just until combined—the bananas will naturally leave some texture.
- Add the eggs one at a time, mixing on low speed only until incorporated. Overmixing here can lead to cracks later.
- Pour half of the cheesecake batter over the baked crust. Arrange the banana slices evenly on top, then sprinkle with crushed wafers.
- Spoon the remaining batter over the layers and smooth the surface.
- Set Up the Water Bath
- Choose one of the following methods using a large roasting pan filled with hot water:
- Pan-inside-pan method: Place the springform pan inside a slightly larger cake pan, then set it in the roasting pan. Fill with hot water halfway up the outer pan to keep moisture out of the crust.
- Foil-wrap method: Wrap the springform pan tightly with two layers of heavy-duty foil before placing it directly in the water bath.
- Bake and Chill
- Bake for 80–90 minutes, until the edges are firm and the center still has a gentle jiggle.
- Turn off the oven, crack the door open slightly, and let the cheesecake rest inside for 30 minutes to cool gradually.
- Remove from the water bath and cool completely on a rack.
- Cover tightly and refrigerate for at least 6 hours, preferably overnight.
- Whipped Vanilla Pudding Topping
- In a large bowl, whisk the pudding mix with cold milk using a hand mixer for about 2 minutes until thick. Chill while preparing the whipped cream.
- In a separate chilled bowl, beat the heavy cream with vanilla until stiff peaks form.
- Gently fold the whipped cream into the pudding until smooth and fluffy—slow and gentle is the key here.
- Remove the chilled cheesecake from the pan, spread the pudding topping evenly over the surface, and finish with crushed vanilla wafers.
Notes
For the smoothest cheesecake texture, take all dairy ingredients out of the fridge about 2 hours before baking. Room-temperature ingredients blend better and reduce lumps.
- Prep Time: 1 hour
- Cook Time: 1 hour 25 minutes
- Category: Desserts
Nutrition
- Calories: 370 kcal
- Sugar: 23 g
- Sodium: 189 mg
- Fat: 28 g
- Saturated Fat: 17 g
- Unsaturated Fat: 7 g
- Trans Fat: 0.2 g
- Carbohydrates: 28 g
- Fiber: 1 g
- Protein: 4 g
- Cholesterol: 82 mg


