
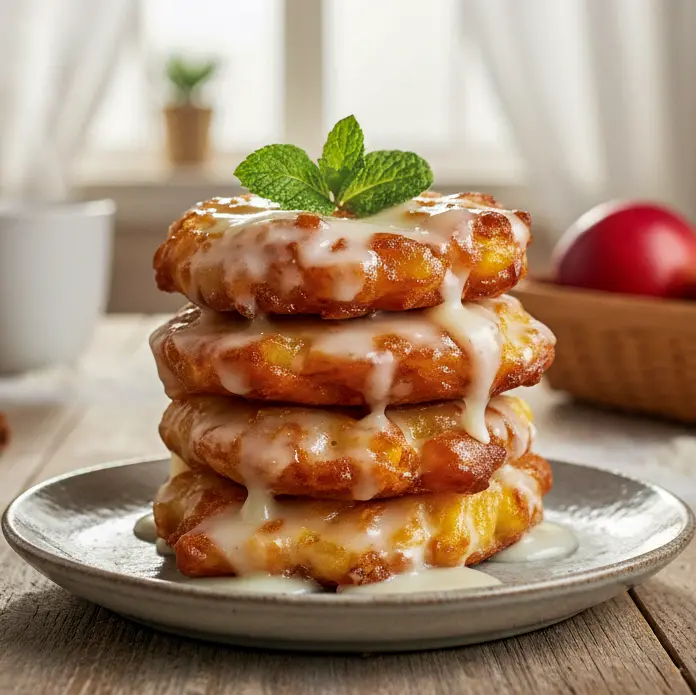
If you’re craving something that screams cozy fall comfort and smells like pure happiness wafting from your kitchen, you’re in the right place. These Fall Baking Easy Recipes for Baked Apple Fritters are your new secret weapon when that apple-cinnamon craving hits. They’ve got everything you love about fairground-style fritters — the sweet, tender apples, the golden exterior, that shiny vanilla glaze — but with a wholesome, oven-baked twist.
They’re lighter, less greasy (so yes, you can totally eat two and not feel guilty), and taste like something Ina Garten would pull out of her oven and say, “How easy was that?” Seriously, this is one of those Apple Fritter Recipes Easy enough to whip up on a lazy Sunday but impressive enough for a cozy brunch spread.
Let’s dive into why you’ll absolutely fall in love with these beauties — and how to make them perfectly every time.
What Makes This Recipe So Irresistible
Let’s be real — the smell alone could make anyone weak in the knees. These baked apple fritters have all the cozy flavors you crave when sweater weather hits: warm cinnamon, a hint of nutmeg, and chunks of juicy apple baked into a fluffy, golden batter.
Unlike fried versions, these are baked, which means:
- Less mess. No splattering oil or deep fryer cleanup.
- Healthier indulgence. You can actually call these “breakfast” and mean it.
- Even baking. Each fritter comes out puffed and golden, not greasy.
If you’ve ever loved the nostalgia of Biscuit Apple Fritters, this is that — just elevated and a bit classier. Think of it as the Breakfast Classic that grew up, went to culinary school, and learned about balance.
The Story Behind These Baked Apple Fritters
You know that moment when you bite into a fairground apple fritter — the crispy shell gives way to soft, apple-studded dough — and you instantly feel five years old again? That’s what inspired this recipe.
I wanted to recreate that magic, but without the frying hassle. So, I played around with oven-baked versions, adjusted the spices, and added a glaze that clings just right. What came out of my kitchen was pure autumn joy.
And yes, I’ve tested this one a lot (for research, of course). Every batch makes my kitchen smell like an apple orchard married a bakery. FYI: that’s exactly the scent that makes people think you’ve got your life together.
Ingredients You’ll Need (and Why They Matter)
Here’s the best part — you don’t need anything fancy. Just simple pantry staples and a few crisp apples.
- All-purpose flour: For that perfect tender bite.
- Granulated sugar: Sweet, but not cloying — just enough to make the apples shine.
- Baking powder + baking soda: The dynamic duo for fluffiness.
- Salt: Because every dessert needs balance.
- Cinnamon + nutmeg: The heart of every good Cozy Winter Baking Recipes list.
- Apples (Granny Smith or Honeycrisp): Juicy, tart, and perfect for baking.
- Eggs: To bind and add richness.
- Milk: For a smooth, pourable batter.
- Unsalted butter (melted): Adds that buttery depth we all crave.
- Vanilla extract: Because vanilla makes everything taste like home.
Glaze magic: Powdered sugar, milk, and a touch of vanilla. It’s simple, classic, and glossy — the finishing touch that makes each fritter irresistible.
How to Make These Apple Fritters (Easy and Foolproof!)
Grab your apron and let’s bake — this process is straightforward, but oh-so satisfying.
Step 1: Prep & Preheat.
Set your oven to 375°F (190°C) and line a baking sheet with parchment paper. No sticking, no mess.
Step 2: Mix Dry Ingredients.
In a large bowl, whisk together your flour, sugar, baking powder, baking soda, salt, cinnamon, and nutmeg. Even distribution = perfectly spiced fritters.
Step 3: Mix Wet Ingredients.
In another bowl, combine eggs, milk, melted butter, and vanilla extract. This gives you a smooth, creamy base.
Step 4: Combine & Fold.
Pour the wet mixture into your dry ingredients and gently fold until combined. Then add your diced apples — every little bit gets coated in that cozy batter.
Step 5: Shape & Bake.
Scoop spoonfuls of batter onto your baking sheet, leaving space for them to puff up. Bake for 15–18 minutes, until golden brown and fragrant.
Pro tip: Don’t overbake! Slightly soft centers make them melt-in-your-mouth good.
Step 6: Glaze & Shine.
While still warm, drizzle your homemade glaze over each fritter. Watch as it sets into that glossy, bakery-style finish.
And there you go — no fryer, no grease, just pure apple-cinnamon bliss.
Pro Tips for the Best Outcome
Want fritters that look and taste bakery-perfect every time? Keep these tips in mind:
- Don’t overmix the batter. It keeps them tender and fluffy.
- Use crisp apples like Granny Smith — soft apples make mushy fritters.
- Bake on parchment for easy cleanup and even browning.
- Glaze while warm. The warmth helps it stick beautifully.
- Add crunch. Stir in chopped nuts for texture or top with coarse sugar before baking.
Little tweaks like these turn good fritters into “OMG where did these come from?” fritters.
Variations to Try
Once you’ve mastered the base recipe, play around with it!
- Apple Fritter Cheesecake: Crumble a few baked fritters over a creamy cheesecake — trust me, it’s a game-changer.
- Apple Breakfast Pastries: Fill puff pastry rounds with the fritter batter and bake for handheld treats.
- Easy Apple Baked Goods twist: Add a drizzle of caramel or sprinkle sea salt for a sweet-savory combo.
- Biscuit Apple Fritters remix: Use canned biscuit dough if you’re short on time. It’s fast, fun, and shockingly delicious.
This recipe is endlessly adaptable — and you’ll love finding your favorite spin.
Best Way to Serve These Beauties
These baked fritters are ridiculously versatile.
For breakfast: Pair with a steaming mug of coffee or spiced chai.
For dessert: Add a scoop of vanilla ice cream and drizzle more glaze.
For brunch parties: Stack ‘em high and dust with powdered sugar — they disappear fast!
They’re that Breakfast Classic you’ll keep coming back to, season after season.
Quick Tips for Storage & Leftovers
Got leftovers? (Lucky you!) Here’s how to keep them fresh:
- Room temperature: Store in an airtight container for 1–2 days.
- Fridge: Keeps for up to 3 days — just pop in the microwave for 10 seconds before eating.
- Freezer: Freeze unglazed fritters for up to 2 months. Reheat and glaze fresh.
Bonus tip: If they seem a bit dry after storage, warm them slightly and brush with melted butter before glazing. Instant revival!
FAQs About These Baked Apple Fritters
What apples are best?
Go for Granny Smith for tartness or Honeycrisp for sweetness. Both hold up beautifully in baking.
Can I make this gluten-free?
Absolutely! Swap in a 1:1 gluten-free flour blend. The texture stays soft and satisfying.
Do I have to peel the apples?
Nope! Peeling gives a smoother texture, but unpeeled apples add a rustic vibe (and extra fiber).
How thick should my glaze be?
Thick enough to coat the back of a spoon but still drizzle easily — think ribbon-like.
Can I add mix-ins?
Oh yes. Nuts, raisins, even a hint of cardamom or ginger can make your fritters extra special.
Why You’ll Keep Coming Back to This Recipe
Here’s the thing — these fritters check every box. They’re:
- Easy to make.
- Smell like fall in a bakery.
- Baked, not fried.
- Perfect for breakfast or dessert.
You’ll make them once and instantly add them to your Cozy Winter Baking Recipes rotation. Whether you’re craving something like Ina Garten Apple Fritters or just looking for new Easy Apple Baked Goods to love, this one’s a keeper.
And if you ever need a dessert that says “I tried, but not too hard,” these are your go-to. A mix of homemade charm and no-fuss simplicity — just how baking should be.
So grab those apples, preheat that oven, and let’s make your kitchen smell like the coziest fall day ever. Because honestly? Once you try these, you’ll wonder how you ever lived without them. 🍎✨ Print

Fall Baking Easy Recipes – Baked Apple Fritters So Good, They’ll Disappear Fast!
- Total Time: 35 minutes
- Yield: 12 fritters 1x
Description
If you’re craving a cozy, cinnamon-scented breakfast that tastes like a hug in pastry form, these Baked Apple Fritters are your answer. Each bite is soft, warm, and filled with tender apple chunks — and since they’re baked, not fried, you get all the comfort without the grease. They’re perfect for chilly mornings, lazy weekends, or when you just want your kitchen to smell like fall.
Ingredients
Dry Ingredients
- 2 cups (250g) all-purpose flour
- ¼ cup (50g) granulated sugar
- 1 teaspoon baking powder
- ½ teaspoon baking soda
- ½ teaspoon salt
- 1 teaspoon ground cinnamon
- ¼ teaspoon ground nutmeg
Wet Ingredients
- 2 large apples, peeled, cored, and diced (Granny Smith or Honeycrisp work best)
- 2 large eggs
- ½ cup (120ml) milk
- ¼ cup (60g) unsalted butter, melted
- 1 teaspoon vanilla extract
Glaze
- 1 cup (120g) powdered sugar
- 2 tablespoons milk
- ½ teaspoon vanilla extract
Instructions
- Get the Oven Ready
- Preheat your oven to 375°F (190°C). Line a baking sheet with parchment paper — trust me, this step saves you from scrubbing later and keeps your fritters from sticking.
- Mix Up the Dry Ingredients
- In a medium mixing bowl, whisk together the flour, sugar, baking powder, baking soda, salt, cinnamon, and nutmeg. Make sure the spices are evenly distributed — that’s where all the warm, cozy flavor comes from.
- Whisk the Wet Ingredients
- In a separate bowl, combine the eggs, milk, melted butter, and vanilla extract. Whisk until the mixture is smooth and creamy. This will help give your fritters that tender, fluffy texture.
- Make the Batter
- Pour the wet mixture into the dry ingredients and gently fold everything together until no flour streaks remain. Don’t overmix — that’s the secret to light fritters instead of dense ones.
- Now, toss in the diced apples and stir just until they’re evenly distributed throughout the batter.
- Shape and Bake
- Using a spoon or cookie scoop, drop mounds of batter onto the prepared baking sheet, leaving about 2 inches of space between each. They’ll puff up as they bake!
- Bake for 15 to 18 minutes, or until the fritters are golden brown and your kitchen smells like heaven.
- Whip Up the Glaze
- While the fritters bake, whisk together the powdered sugar, milk, and vanilla in a small bowl until smooth. The glaze should be thick enough to drizzle but not too runny.
- Glaze and Serve
- Let the fritters cool for a few minutes (you want them warm, not hot), then spoon or drizzle the glaze over each one. Watch it set into a glossy finish that makes them look straight out of a bakery window.
Notes
- Add a Crunchy Twist: Sprinkle chopped pecans or walnuts over the glaze for texture and extra flavor.
- Want More Spice? Add a pinch of ground ginger or cloves to the dry mix for a little warmth.
- Best When Fresh: These fritters taste incredible right out of the oven, but you can store leftovers in an airtight container for up to 2 days. Pop them in the microwave for 10 seconds to bring back that fresh-baked goodness.
- Make Ahead: Bake the fritters ahead of time, freeze them unglazed, and warm them up before adding the glaze when you’re ready to serve. Perfect for busy mornings!
- Prep Time: 15 minutes
- Cook Time: 20 minutes
- Category: Breakfast
Nutrition
- Serving Size: 1 fritter
- Calories: 180 kcal
- Sugar: 14 g
- Sodium: 180 mg
- Fat: 4 g
- Saturated Fat: 2 g
- Unsaturated Fat: 2 g
- Trans Fat: 0 g
- Carbohydrates: 34 g
- Fiber: 2 g
- Protein: 3 g
- Cholesterol: 35 mg


