
There are desserts that make you smile, and then there are desserts that make you grin uncontrollably while sneaking back for seconds. These Recipes With Caramel Bits, featuring gooey, crunchy, no-bake Butterfinger Bars, fall firmly in the latter category. If you’ve ever wished for a dessert that’s rich, indulgent, and ridiculously easy to throw together — this is it.
No oven. No complicated steps. Just layers of buttery graham crackers, molten caramel, and crisp, peanut-buttery Butterfinger Bars chunks that make every bite a mix of chewy and crunchy perfection. And the best part? You can whip these up faster than it takes to binge an episode of your favorite comfort show.
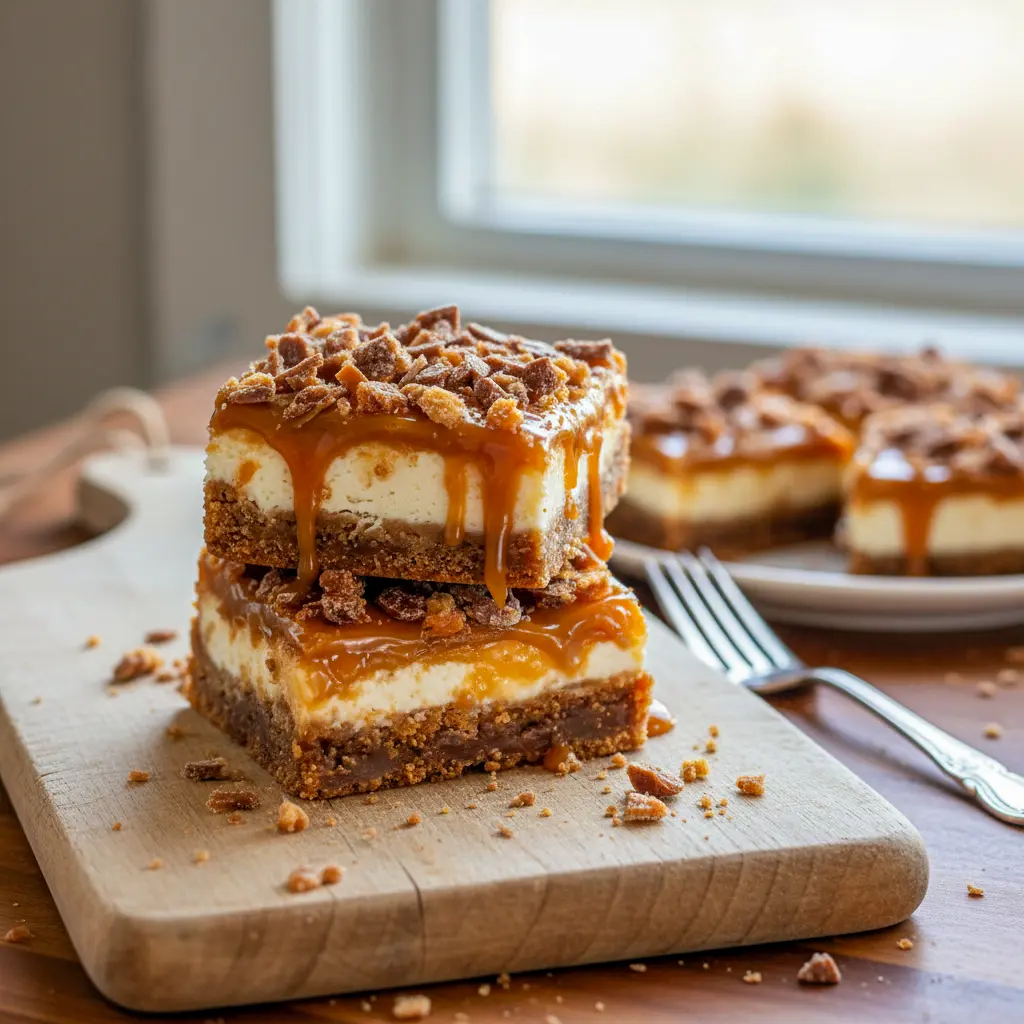
These Butterfinger Caramel Bars No Bake are everything you love about dessert—sweet, salty, creamy, crunchy, and totally addictive. Seriously, if desserts had a red carpet, these bars would strut down it with confidence and a caramel drizzle cape.
What Makes These Butterfinger Caramel Bars So Irresistible?
Let’s be honest—sometimes the simplest treats are the best ones. You don’t need a fancy stand mixer or any complicated steps here. Just a handful of pantry staples, a microwave, and maybe a little patience while they chill (the hardest part, IMO).
Recipes With Caramel Bits like this one are the kind of thing you make once and instantly add to your “forever dessert” list. The caramel bits melt into a buttery, toffee-like sauce that hugs every layer. Meanwhile, Butterfinger Bars bring in that signature crispiness that keeps things from getting too gooey.
They’re perfect for Desserts For Family Reunion, office potlucks, or those moments when your sweet tooth starts whispering “feed me” after dinner. Bonus: they travel beautifully and stay delicious even after a couple of days in the fridge (if they last that long).
Ingredients You’ll Need
Let’s break down the key ingredients that make these bars so magical — and a few fun ways you can tweak them to your taste.
- Graham Crackers – The crispy base layer. Their honeyed sweetness perfectly balances the rich caramel and chocolate.
- Mini Marshmallows – These melt into soft little clouds that give the bars a gooey texture.
- Caramel Bits – The heart of the recipe! These melt into a dreamy, buttery caramel that ties everything together.
- Milk – Just a splash to help the caramel melt into a smooth sauce.
- Butterfinger Bites – The star of the show! Their peanut-buttery crunch makes every bite pop.
- Semi-Sweet Chocolate – For a rich drizzle that adds just the right amount of cocoa depth to balance all that sweetness.
How to Make the Bars (a.k.a. How to Become a Dessert Hero)
You’re just a few easy steps away from dessert greatness.
- Prep the Pan
Line a 9×9-inch pan with foil and give it a light mist of cooking spray. You’ll thank yourself later when the bars lift out perfectly. - Layer the Base
Arrange graham crackers in the pan, breaking them as needed to fit snugly. Think of it as dessert Tetris. - Add the Marshmallows
Sprinkle those mini marshmallows evenly over the graham crackers. They’ll puff and melt into the caramel later—pure magic. - Make the Caramel Sauce
In a microwave-safe bowl, combine your Caramel Bits with milk. Microwave in 30-second bursts, stirring in between, until it’s silky smooth. Don’t overheat it—you want it pourable, not bubbling lava. - Combine the Layers
Pour that golden caramel over the marshmallows. It’s okay if it’s not perfect—imperfection equals personality in this dessert! - Add the Crunch
Scatter chopped Butterfinger Bars across the caramel layer and gently press them in. - Melt and Drizzle the Chocolate
Pop your chocolate in the microwave until smooth, then drizzle it like you’re Picasso with a sweet tooth. - Chill Out
Let the bars chill in the fridge for an hour or so. This step sets the layers, making them slice cleanly (and neatly impress your guests). - Cut and Serve
Lift out the foil, slice into squares, and watch them disappear faster than you can say “No-Bake Dessert Champion.”
The Story Behind This Sweet Creation
The idea for this recipe wasn’t planned—it was pure accident meets dessert destiny. One grocery store run, one candy aisle detour, and a “hmm, what if…” moment later, these bars were born.
You know that feeling when inspiration just strikes out of nowhere? That’s what happened here. It’s funny—sometimes the best recipes come from not overthinking. I’d been feeling a bit uninspired (I blame a long week and too much coffee), but then I spotted Butterfinger Bars bites in those cute little boxes, and boom—idea unlocked.
And honestly? I’m so glad it happened. This dessert checks all the boxes: simple, sweet, crunchy, and guaranteed to make everyone think you spent way more time on it than you actually did.
Pro Tips for the Best Results
Want your Butterfinger Caramel Bars No Bake to turn out bakery-level perfect? Keep these insider tips in mind:
- Don’t rush the chilling. Letting the bars set fully gives you neat slices and the best texture.
- Use fresh caramel bits. Stale ones don’t melt as smoothly and can make the texture grainy.
- Warm them up slightly before serving. This softens the caramel just enough to make every bite heavenly.
- Add flaky sea salt! If you love sweet-salty desserts, a sprinkle of salt on top will change your life.
- Want them extra fancy? Drizzle white chocolate or peanut butter over the top. Instant glow-up.
Variations to Try
Once you’ve mastered this recipe, don’t be afraid to play around with it! These are some of my favorite ways to remix it:
- White Chocolate Lovers: Swap the semi-sweet chocolate drizzle for melted white chocolate. It’s sweet, creamy, and looks stunning.
- Nutty Crunch: Add chopped almonds, pecans, or peanuts between the layers for extra texture.
- Peanut Butter Explosion: Mix a spoonful of peanut butter into the caramel before pouring it on.
- Candy Bar Swap: No Butterfingers? Use Reese’s, Snickers, or even KitKats. (Trust me, they all work.)
- Festive Touch: Add red and green sprinkles for the holidays or pastel M&Ms for Easter.
Every variation still captures that Better Than Anything Bars vibe while letting your creativity shine.
Best Way to Serve These Bars
You can serve these Recipes With Caramel Bits chilled for a firmer bite or at room temperature for a gooey, chewy experience. Personally, I like to let them sit out for 10 minutes before serving—they hit that perfect sweet spot between soft and crisp.
These bars are also the ultimate Easy Dessert For Party treats. Slice them small for bite-sized nibbles or go bold with big squares if you’re feeling indulgent. Either way, they’ll disappear off the dessert table before you can even grab a second piece.
Pair them with:
- A scoop of vanilla ice cream for next-level decadence.
- A hot cup of coffee or cocoa (because balance, right?).
- A movie night or a game-day spread—they fit any vibe.
Quick Tips for Storage and Leftovers
If by some miracle you have leftovers (unlikely, but possible), here’s how to keep them fresh:
- Room Temp: Store in an airtight container for up to 3 days.
- Fridge: Keeps for up to 4 weeks—just bring to room temp before eating.
- Freezer: Store for up to 3 months. Wrap tightly in parchment or plastic wrap before freezing.
Pro tip: Stack with parchment between layers so they don’t stick. When ready to serve, let them thaw on the counter for about 15 minutes.
FAQs About Butterfinger Caramel Bars
Q: Can I make these ahead of time?
Absolutely! These bars actually taste better after chilling overnight—the flavors meld beautifully.
Q: What if I can’t find caramel bits?
You can substitute wrapped caramels (just unwrap and melt with milk), or even use homemade caramel if you’re feeling fancy.
Q: Can I double the recipe?
Yes! Just use a 9×13 pan and double all the ingredients. Perfect for Desserts For Family Reunion or big gatherings.
Q: Can I skip the marshmallows?
Sure thing. The texture will be slightly less gooey, but still delicious.
Q: How long can they sit out at room temperature?
Up to 3 hours before they start getting too soft—ideal for serving at parties.
Final Thoughts
If desserts could win awards for being both lazy and legendary, these Recipes With Caramel Bits would take the trophy home. They’re indulgent without being fussy, kid-friendly yet impressive enough for adults, and a guaranteed hit at every event.
Whether you’re hosting friends, craving a midnight snack, or prepping something sweet for your next Desserts For Family Reunion, these bars hit all the right notes. The crunchy Butterfinger, buttery caramel, and smooth chocolate make them the kind of dessert people remember long after the last bite.
So next time you want to wow a crowd—or just treat yourself—grab some Caramel Bits, whip out your Brickle Bars spirit, and make these unforgettable Butterfinger Bars.
Who knew a few simple ingredients could deliver something so divine? Here’s to gooey layers, no-bake magic, and desserts that make every bite feel like a tiny celebration. Print

Recipes With Caramel Bits – Indulgent Butterfinger Bars with Crunchy Goodness
- Total Time: 1 hour 15 minutes
- Yield: 24 servings 1x
Description
Get ready for a sweet little miracle — no oven required! These dreamy Butterfinger Bars combine rich, melted caramel, gooey marshmallows, and that unforgettable Butterfinger crunch in one ridiculously easy dessert. They come together so quickly, you’ll wonder why you ever bothered baking anything at all.
I first discovered this combo after spotting Butterfinger bites tucked away near the candy aisle in tiny boxes (not the big bags!). It felt like a little sign from the dessert gods, and let’s just say — it totally delivered.
Ingredients
- 6 ½ graham crackers, for a crisp, golden base
- 2 cups mini marshmallows, soft and fluffy pockets of sweetness
- 1 (11 oz) bag caramel bits, the heart of that gooey caramel layer
- 2 tablespoons milk, to smooth out the melted caramel
- 1 (10 oz) bag Butterfinger Bites, chopped roughly for that signature crunch
- 2 ounces semi-sweet chocolate, melted and ready for the grand drizzle finale
Instructions
- Prep the Pan:
- Grab a 9×9-inch square pan and line it with foil, leaving a little overhang on the sides for easy lifting later. Give it a quick spritz of cooking spray so nothing sticks.
- Build the Base:
- Lay your graham crackers neatly along the bottom, breaking them up where needed so they fit snugly — think of it as your crispy foundation layer.
- Add the Marshmallows:
- Toss those mini marshmallows evenly across the graham crackers. Don’t worry if they’re not perfectly even; they’ll melt down beautifully later.
- Melt the Caramel:
- In a microwave-safe bowl, combine your caramel bits with the milk. Heat for one minute, give it a good stir, and then continue microwaving in 30-second bursts until the mixture turns silky smooth.
- Pro Tip: Keep stirring between intervals — caramel loves to burn when left alone too long.
- Pour the Caramel Layer:
- Once melted, slowly drizzle the caramel all over the marshmallows. Use a spatula or the back of a spoon to gently spread it out. The marshmallows will soften just a bit — that’s exactly what you want.
- Add the Butterfinger Magic:
- Now comes the fun part! Sprinkle your chopped Butterfinger Bites across the top and press them gently into the caramel so they stick.
- Melt the Chocolate:
- Pop your chocolate into another microwave-safe bowl and heat it in 30-second intervals, stirring until it’s smooth and glossy.
- Drizzle Like a Pro:
- Use a fork or piping bag to drizzle that melted chocolate across the top of your bars. It doesn’t have to be perfect — a little artistic chaos looks delicious.
- Chill Time:
- Slide the pan into the fridge for about an hour, or until the bars have firmed up and the layers have set.
- Slice & Serve:
- Once chilled, lift the foil out of the pan and place it on a cutting board. Slice into neat squares (or not-so-neat ones — no judgment) and get ready to impress your taste testers.
Notes
- Don’t rush the chilling time! The layers need that hour to firm up just right.
- Too firm? Let them sit out for 5–10 minutes before serving to make the caramel extra chewy.
- Make it your own: Try swapping Butterfinger for Reese’s Cups or Heath bits if you’re feeling adventurous.
- Prep Time: 15 minutes
- Cook Time: 1 hour
- Category: Desserts


